Whether you’re working on a brand new website, or building your existing site’s organic presence, it’s important to showcase your topical authority to both Google and your audience.
They want to see that the information you provide, or the products that you sell, are of great quality and are coming from a credible source.
That’s why it’s essential to present yourself as an authority through your content and your backlink profile.
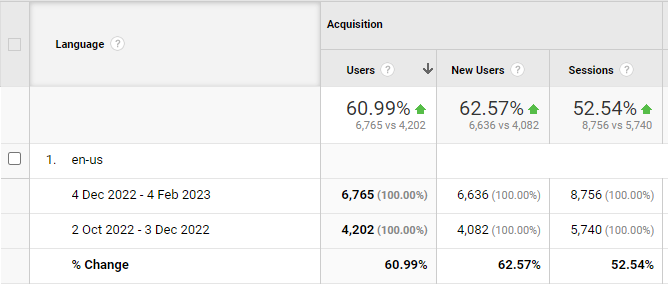
In this case study, you’ll learn the exact steps that my team at The Search Initiative took to increase our client’s organic traffic by 60.99%.
In this article, you’ll learn how to:
Establish your website as an authority in your industry with E-E-A-T signals
Build topical authority by publishing supplementary blog content
Execute an SEO-friendly site migration from scratch
Optimize product pages
Carry out a HARO link building campaign
Before that, let’s find out a bit more about the website’s goals and the main challenges faced during the campaign.
Table Of Contents
The Challenge
The client is a website selling health supplements in the United States, who joined the agency having already decided that they wanted to migrate their dated website and build a fresh site from the ground up with SEO in mind.
One of the main challenges of this campaign was to make sure that the migration was carefully planned and executed to ensure that the site’s original rankings and traffic were sustained.

We also added E-E-A-T signals that established the client as a trustworthy and authoritative voice within the industry – read on to learn how to do this.
The next focus was to produce well optimized content for the product pages by writing compelling descriptions that convert as well as producing supporting blog content to build topical relevance and improve keyword visibility for informational keywords.
Finally, to build the backlink profile of the new domain, we boosted the newly optimized product pages by executing a link building strategy, including HARO (which you’ll learn all our tricks soon).
Find out how you can overcome these challenges for your website by following the steps below.
Executing an SEO-Friendly Site Migration
Making the decision to migrate your entire website shouldn’t be taken lightly. In some cases you might not have a choice, which is why it’s worth being aware of the risks and challenges that you might face along the way.
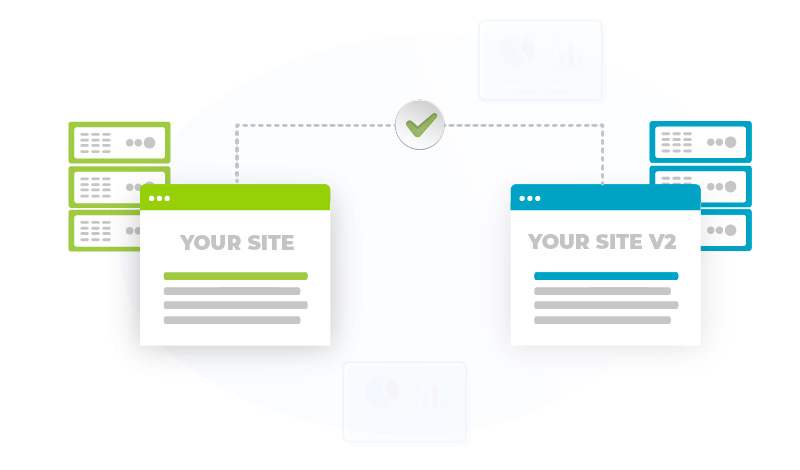
Apart from potentially completely losing or breaking parts of your website, a site migration can also have significant impacts on your SEO.
I’ll walk you through the process of an SEO-friendly site migration below, but for now, let’s look at what a site migration actually is.
What Is a Site Migration?
A site migration is the process of making significant changes to a website’s structure, technology or design.
Here are some examples on why you might want to consider a site migration:
New Domain – you want to change your domain name as part of your rebranding or redesign.
New Framework or CMS – for example if you’re moving from BigCommerce to Shopify.
New Server – you may decide to switch hosting providers with the aim of speeding up your website’s loading times. This may be the case if your site is growing and you want to be able to make sure that your servers are able to cope with an increase in demand.
Unsure about which hosting provider to use? Check out my video below.
Mobile Site – you’re building the mobile version of your website.
How Site Migrations Can Impact SEO
A site migration is a substantial task that requires rigorous and thorough research and planning before you even begin to execute the strategy. With many moving parts and teams involved, it’s important to be aware of the SEO impacts that this can have.
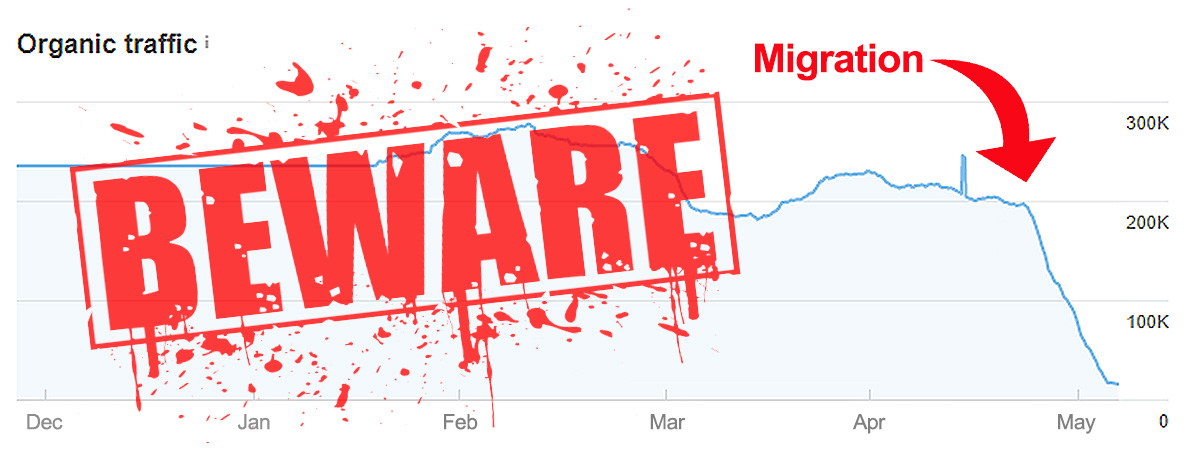
For example, without careful planning, you may lose your site’s precious rankings and traffic due to incorrect URL mappings and redirects or, you may encounter slow site-wide loading times as a result of incorrect server configurations.
Even after the migration is complete and everything has gone to plan, it’s crucial to monitor progress to ensure that your site maintains and/or builds as much organic visibility as possible post-migration.
SEO Site Migration Checklist
I’ve put together this checklist so that you can be sure that your migration will be executed in an efficient and SEO-friendly way.
 Pick a Smart Migration Date
Due to the scope of the work and risks involved, it’s good practice to plan your site migration for a time where, should things go wrong or there is a temporary dip, the impact is minimal. This is of course, assuming that your business has some seasonality to it.
A site migration before or during the holiday season is not advised. The last thing you want to do is lose out on all of the potential traffic from a peak season as a result of your migration not being executed properly.
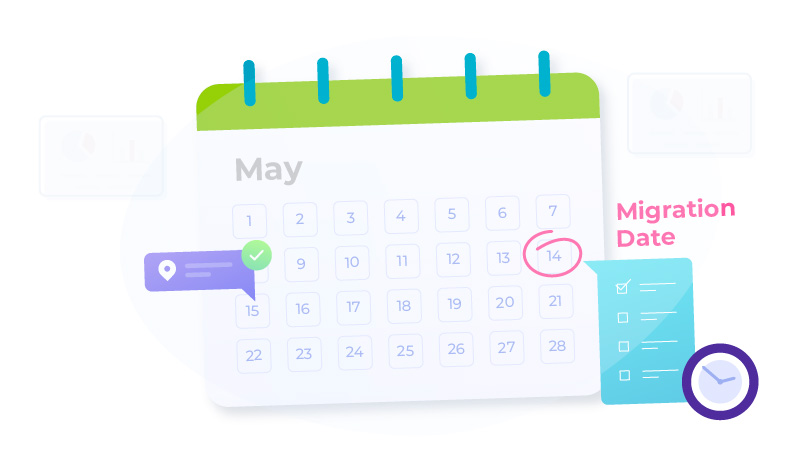
Likewise, some days of the week may be quieter than others. For example, you may find that the start of the week is the best time to do your migration as fewer people browse your site at this time.
Personally, I always migrate on Saturdays.
Therefore, make sure to pick a smart migration date that allows time for you to monitor progress and iron out any issues that are presented post-migration.
 Crawl Your Existing Website
Using an SEO web crawler tool of your choice (i.e. SEMRush, Screaming Frog, Sitebulb etc), crawl your website so that you have a comprehensive record of everything that is on your website before the migration.
For example, this will ensure that you have:
A complete list of the URLs on your original website so that nothing gets lots during the migration.
All of the metadata (i.e. page titles, headings, meta descriptions, URLs) related to your pages.
A list of any existing redirects, broken links and 404 pages that you can address and fix during the migration.
 Create a Backup of Your Site
You should also create a backup so that if for whatever reason the launch of your new site doesn’t go to plan, you can always revert back to the original if needed.
Here’s a comprehensive guide on how to backup your website.
This precautionary step is vital in making sure that you have peace of mind before launching.
 Create a Staging Website
The next step is to create a copy of your website so that you can test and revise all of the changes that you intend to make – this is called a staging site.
This staging site should be uploaded to a new server and ideally, should be on a separate domain or subdomain so that you can compare your new website to the original site before the launch.
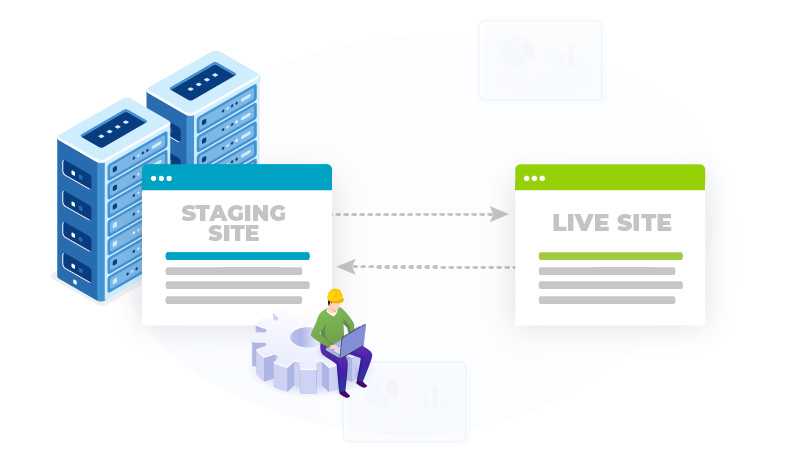
This’ll allow you to check and verify important things like making sure that the URLs from your old site are correctly redirected to the new site.
Another important step is to make sure that you block access to this staging website from Google. This is to prevent both the staging site AND the original site from being indexed by search engines and in turn, potentially competing against each other for rankings.
There are several ways you can do this:
Robots,txt File – create a new robots.txt file for your staging site so that you can block Google from crawling it. This is the directive that you need to include:
User-agent: Googlebot Disallow: /
Password Protection – another way to block access is to password protect your staging site so that only the people and tools that you want to access the new site, can do so.
Noindex Tag – adding a noindex tag to all your pages is another option, but you just need to remember to remove this tag during the migration so that once you’ve launched your site, Google can start to crawl and index it.
Add the following line of code to your pages:
<meta name="robots" content="noindex">
 Map Your URLs
You can’t carry out a migration without a clear and well organized URL map.
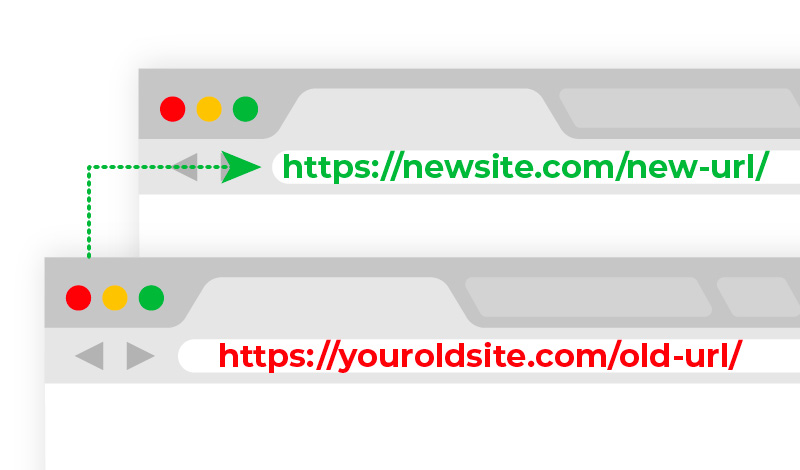
Mapping your URLs involves keeping a list of all of your existing URLs so that you can match them up with the new URLs on your new website and implement the necessary redirects correctly.
This is why crawling your original website comes in useful.
In addition to your crawl, you should also compile your URLs from your XML sitemap (this is a file that serves as a roadmap for Google to access your pages).
You can access your sitemap via the following URL:
example.com/sitemap.xml
Your URL map can be as simple as this:
| Original URL | New URL | Redirected? |
| olddomain.com/old-url/ | newdomain.com/new-url/ | Yes/No |
If you’re changing the structure of your URLs or combinings old pages into a single page, remember to map all of the combined pages’ URLs to the correct new URL.
 Migrate Your Content
When it comes to actually migrating the content (i.e. your HTML files, images etc), I strongly recommend doing so in small chunks.

The more pages you move at once, the higher the chances of something going wrong. So take your time and carry out the migration whilst carrying out checks and tests at each stage.
This’ll make it easier for you to identify any potential issues that may arise.
This is also your chance to update any of the content if you need to.
 Implement 301 Redirects
Without implementing proper 301 redirects, your new pages will not receive the traffic and PageRank (ranking power) of the old pages, which will significantly impact the new site’s rankability.
301 redirects are a way of indicating to users and search engines that the location of a web page has permanently moved.
Using your URL map, you can go through each of your pages and implement a 301 redirect from the old URL to the new URL.
If for whatever reason you have an old URL that is no longer needed, you can redirect it to another relevant page on your website, or serve a custom 404 page to let users know that the page no longer exists.
 Update Internal Links
Once you’ve redirected your URLs, you also need to remember to update all of the internal links (hyperlinks from one page on your site to another) on your new website.
You can find all of the internal links from your website crawl that you did right at the start of the process.
You should change all of the internal links from the old URLs to the new URLs to avoid unnecessary internal redirects.
Imagine you had the following scenario.
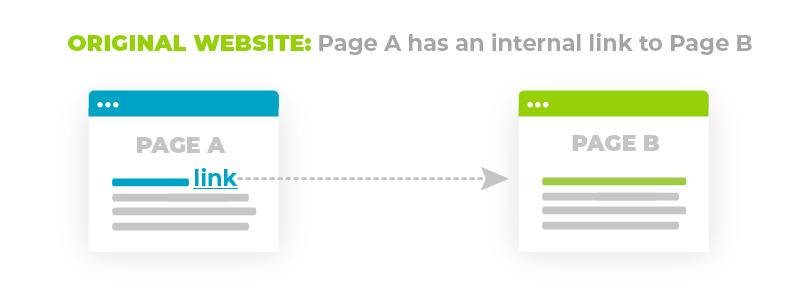
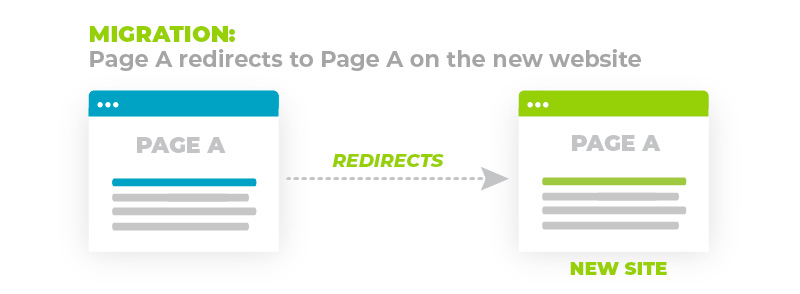
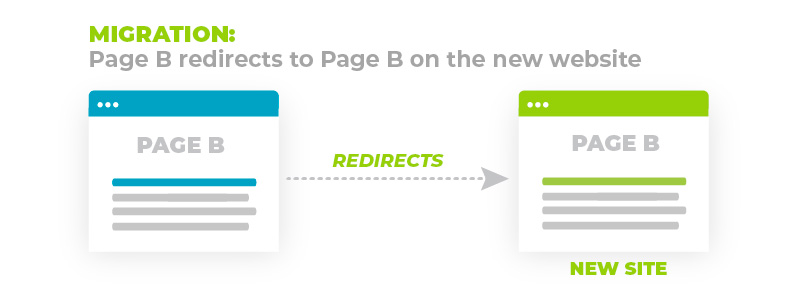
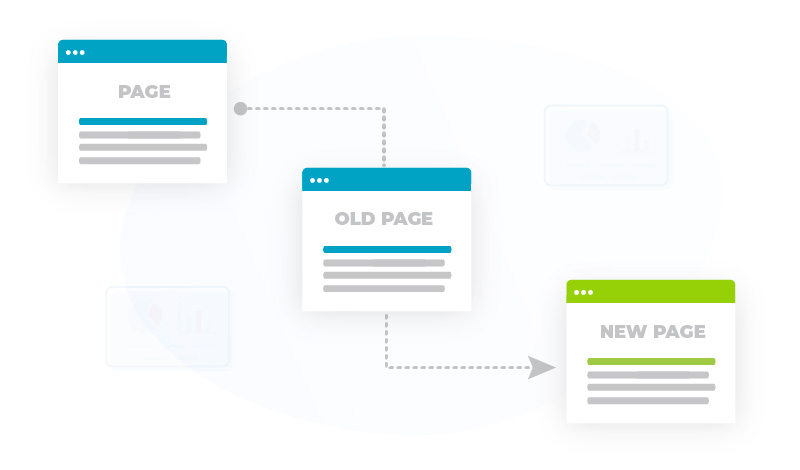
If you don’t update the internal link, then Page A would have an internal link to Page b. But, when clicked, Page b would redirect to Page B.
This creates an unnecessary internal redirect that when multiplied across thousands of requests, can seriously affect page load times.
Therefore, you should update the internal link so that, you have:
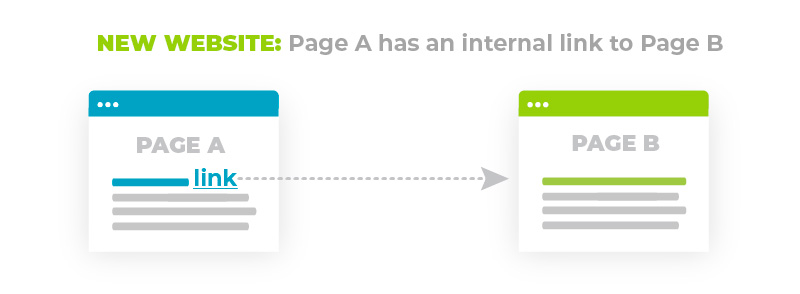
 Update Your Backlinks
Although your 301 redirects will pass PageRank, to get the maximum SEO boost for your new website, you also need to try and update as many backlinks as possible.
To do this, you will need to reach out to the websites linking to you and ask that they update the URL from the old one to the new one.
Likewise, if you’re running any ad campaigns for your old landing pages, these will need updating to the new landing pages too.
💡Top Tip: don’t forget to change any links on your social media pages too!
 Update Your DNS Settings
If you’re migrating to a new server, you’ll need to contact your hosting provider and ask them to update your DNS (domain name server) settings so that it will point to your website’s new IP address.
 Request a Domain Change via Google Search Console
Use the Change of Address Tool to let Google know about your new domain.
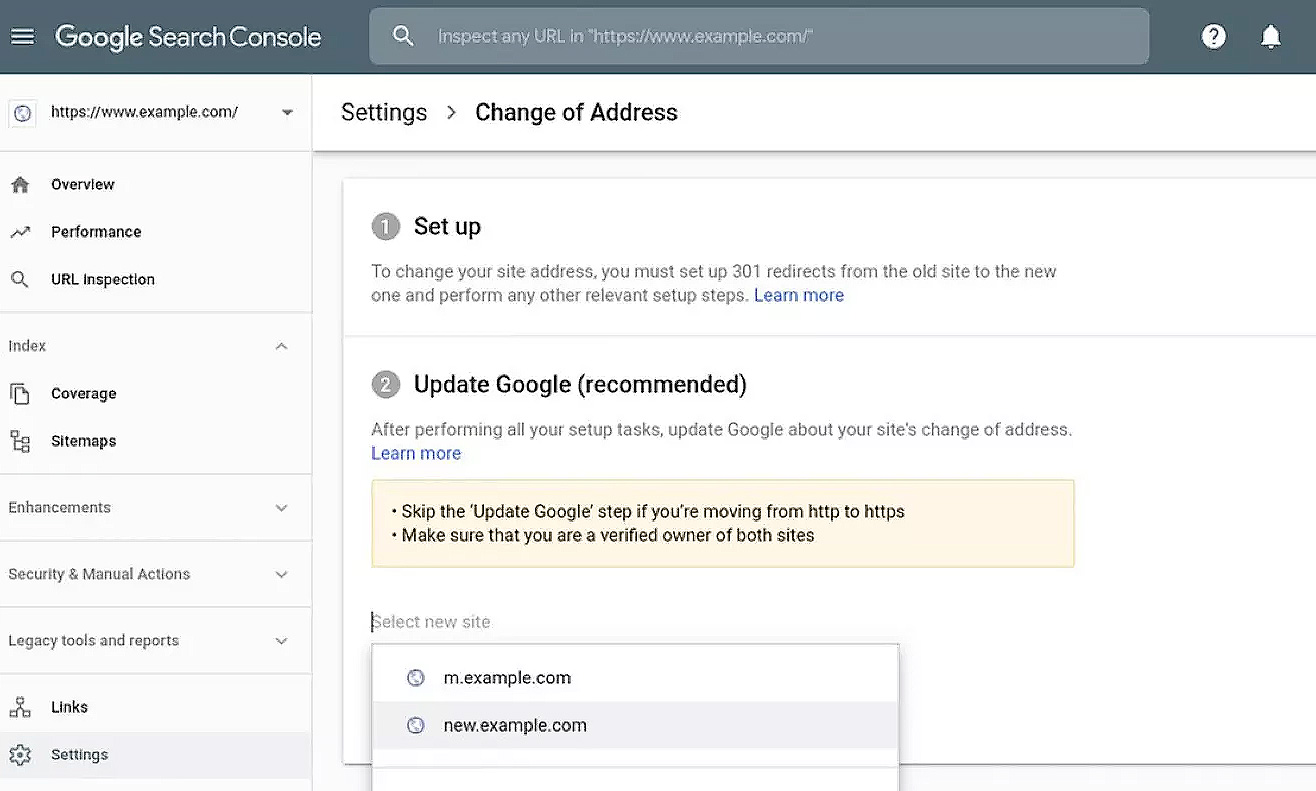
This helps the search engine index your new pages and reduces the risk of your rankings taking a hit.
 Remove Any Temporary Website Blocks
Remember to make sure that you update your robots.txt file for the new site so that it doesn’t block Google from accessing the new URLs.
Make sure that you’ve also removed any form of password protection and any noindex tags from your new web pages.
Without this, Google won’t be able to crawl and index your pages, and thus, your new site won’t rank.
 Create & Upload Your New XML Sitemap
Once all of your URLs have been redirected and any internal links have been updated, the next step is to create your XML Sitemap for your new website so that it contains all of the right pages.
Your new XML sitemap should have the following address:
newdomain.com/sitemap.xml
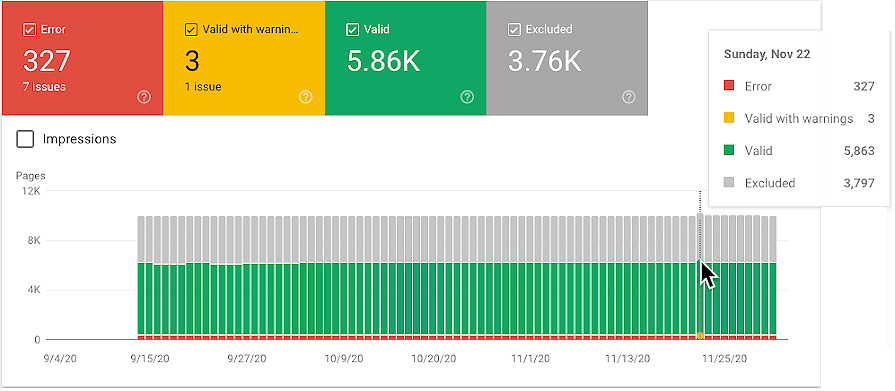
Once you’ve created your XML sitemap, you should upload it to your Google Search Console so that the search engine can start to crawl and index the new pages.
To make sure that all of your URLs are being crawled as expected, use the Coverage (or Page Indexing) report in Google Search Console.
 Resubmit Any Disavowed Links to GSC
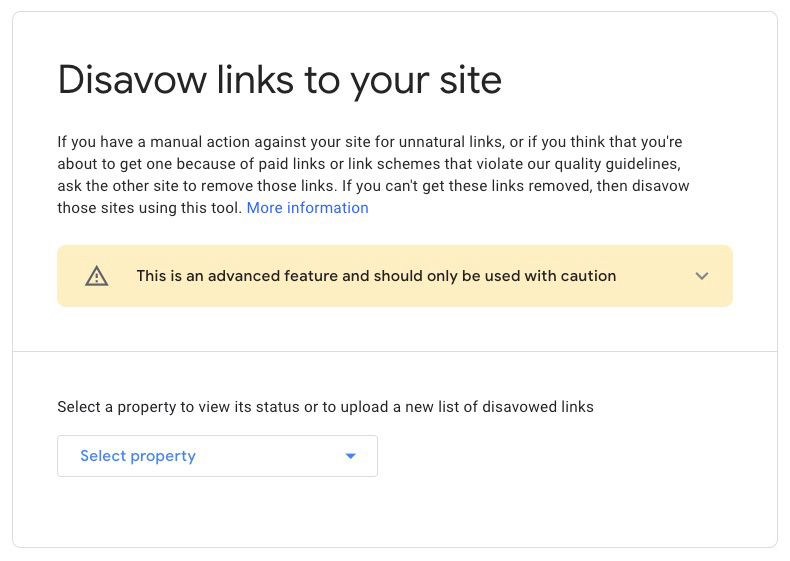
If you’ve set up a new Google Search Console account for the new site, you’ll also need to resubmit your disavow file from your old domain.
The disavow file is a document that informs Google about any backlinks or referring domains that were linking to your previous website, that you do not want to count towards the SEO of your new site.
You can submit your disavow file here.
 Check the Performance of Your New Site
In order to speed up the process of your new pages being crawled and indexed, you should check the page load speed of your new website.
Specifically, pay attention to making sure that your server is fast so that Googlebot is able to crawl as many pages as possible.
Apart from improving the crawlability of your new site, checking the performance of your loading times is naturally advised to provide a great user experience.
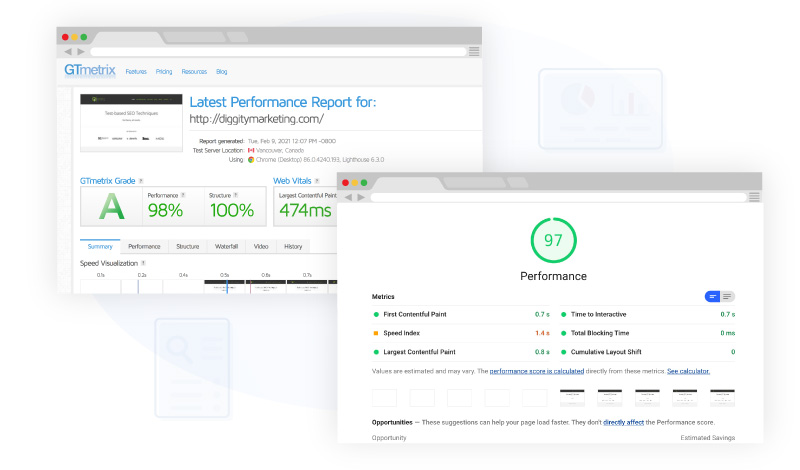
Find out more about optimizing your site speed here.
 Monitor SEO Performance: Traffic, Rankings Etc
It’s normal for a site to see temporary drops in rankings after a site migration as it takes Google time to crawl and index the new pages.
But you should still monitor and track your site’s traffic and keyword rankings to make sure that these temporary drops recover.
If they don’t, you’ll need to perform a full analysis to identify what may have gone wrong during the migration.
Continue to monitor the site’s performance until you’re confident that Google has fully accounted for the migration and that there is no conflict between your old and new domains.
Establishing E-E-A-T
Google recognizes that users prefer to receive information and services from reliable sources.
In recent years, the search engine has concentrated on this issue with its Search Quality Evaluator Guidelines, a 150-page-plus document used by Google’s search quality evaluators, who are actual humans rather than an algorithm.
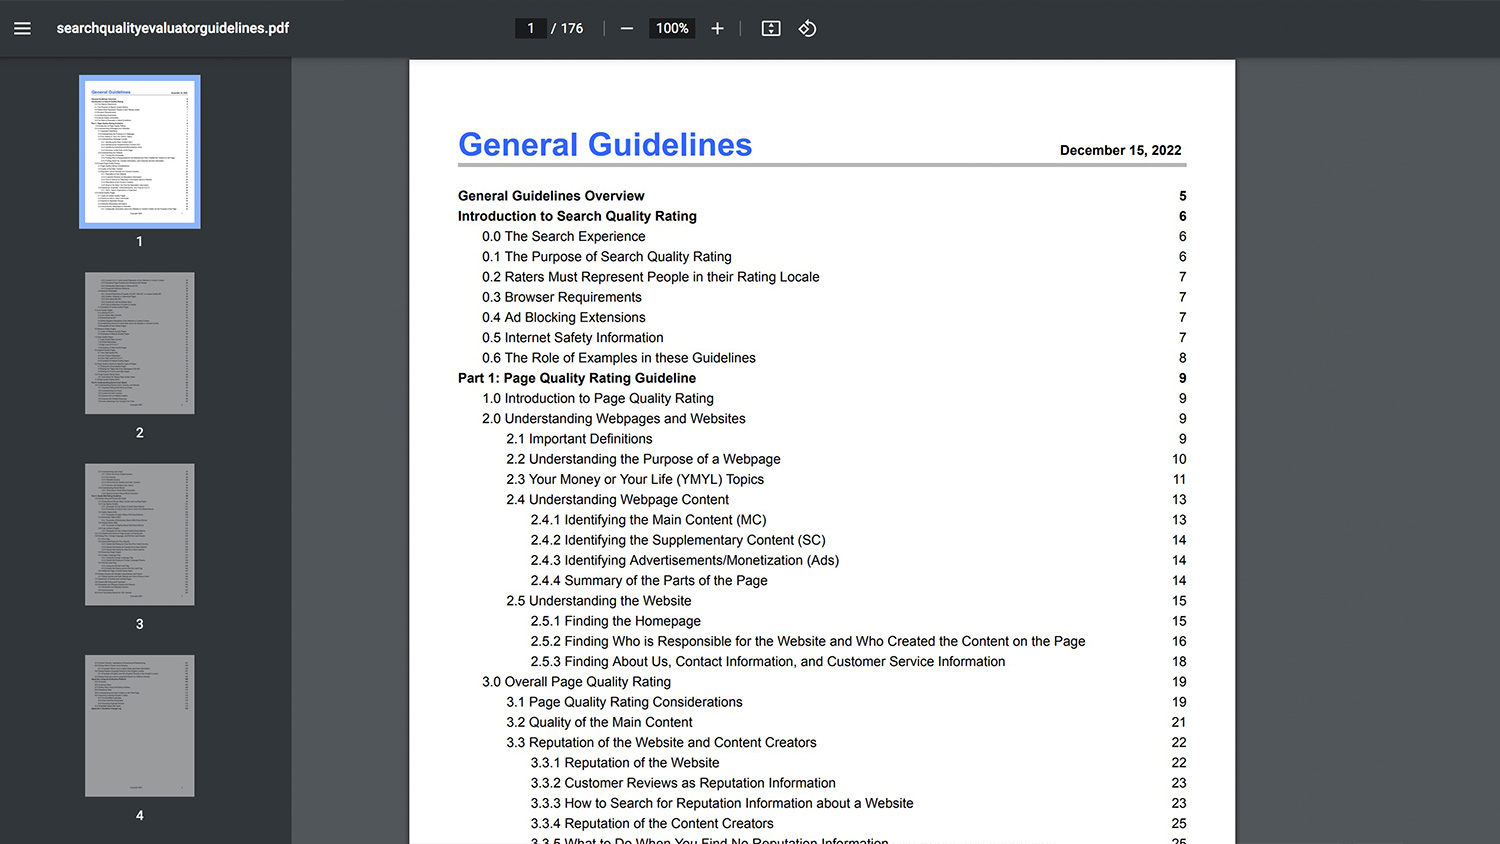
The guidelines include a significant section about something called E-E-A-T (formerly E-A-T), which this particular client was lacking.
In this section, I’ll explain what E-E-A-T is, why it’s important and provide actionable tips on how you can establish E-E-A-T for your own website.
What is E-E-A-T?
Google instructs evaluators to evaluate whether a website exhibits E-E-A-T; which stands for:
Experience – This is a factor introduced in December 2022, which emphasizes the importance of demonstrating your first-hand experience in a topic or industry.
Expertise – This refers to the level of knowledge and skill that a website (and the people behind the website have) has in a particular topic or industry.
Authority – This refers to the website’s (and the people behind the website’s) reputation and the level of recognition it has in its field or industry.
Trustworthiness – This refers to how reliable and trustworthy the content on the website is, and is the most important out of the four signals.
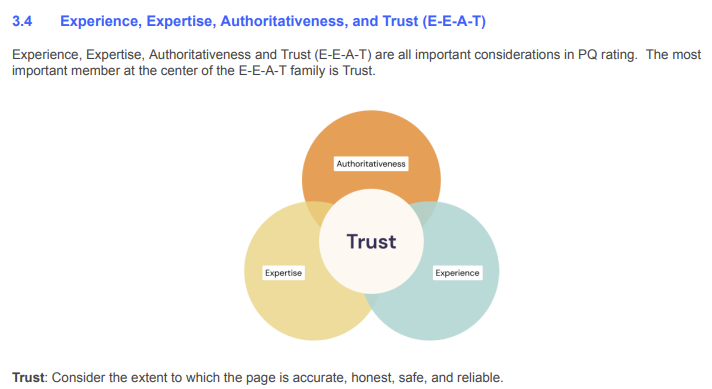
Google’s search quality evaluators use these factors to assess the overall quality of a website’s content. The idea is that websites that exhibit high levels of E-E-A-T are more likely to rank higher in search results, as they are seen as more credible and trustworthy sources of information.
Why is E-E-A-T Important for SEO?
It’s difficult to quantifiably measure E-E-A-T (i.e. there is no “score” for E-E-A-T), which is why it’s not a direct ranking factor and isn’t part of any of Google’s algorithms.
Instead, the search engine uses “a variety of signals as a proxy” to determine whether or not a website (or web page) demonstrated high levels of E-E-A-T.
It’s for this reason that E-E-A-T is still important for all websites, but especially if your site operates within a niche that can impact the physical, financial or mental wellbeing of your audience (i.e. your website is in the Your Money Your Life category).
For example, if you have a website publishing financial articles (e.g. how to file your taxes correctly), then it’s much more important that you need to convey E-E-A-T, because the information you provide could impact your readers’ financial wellbeing.
Therefore, adding as much information about yourself and your brand to your website will help improve your brand identity and credibility in the eyes of Google and your audience.
Tips on How to Establish E-E-A-T
While there’s no E-E-A-T score, there are still ways that you can demonstrate these characteristics and build more credibility in your website.
Make It Easy for Users to Contact You & Find Important Customer Service Information
The first is a simple one – making it as easy as possible for users to reach you by adding your contact details to your website.
This is something that Google asks its Quality Raters to look for in the guidelines.
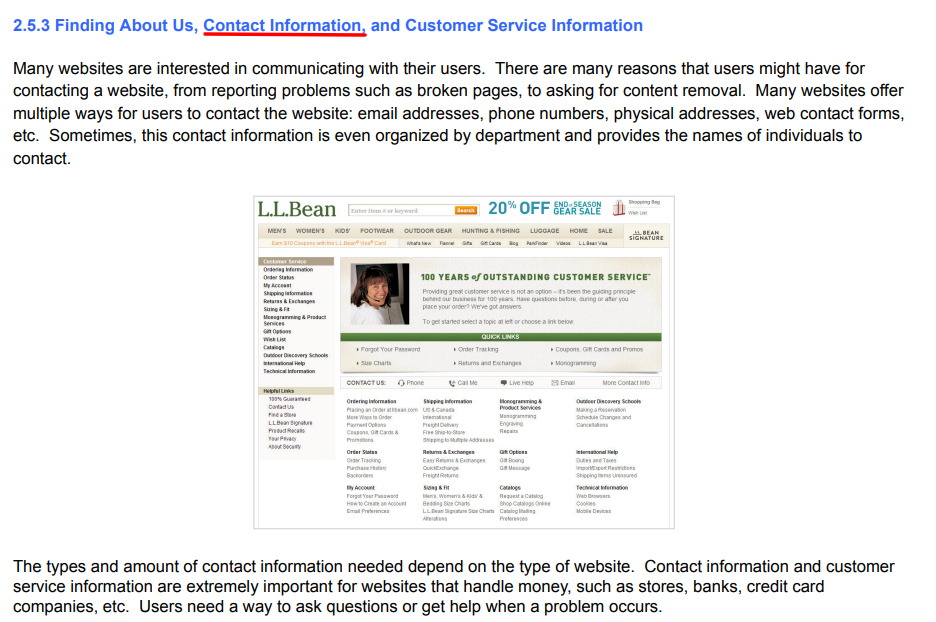
There are several common places where you might do this:
1. A dedicated Contact Us page – this is where you can add all of the information on how your audience can contact you. Apart from your telephone number(s) and any important email addresses, you can also add your physical address in case users want to send you physical mail or visit you.
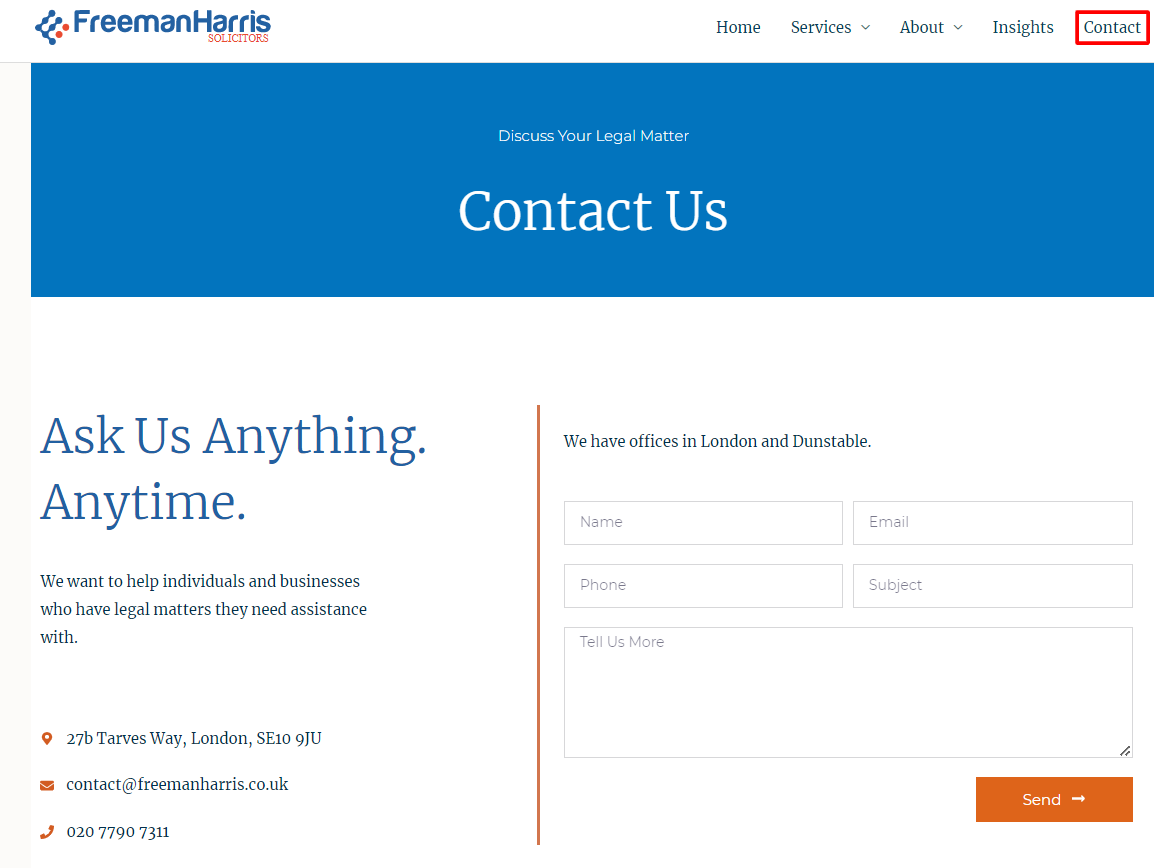
2. In your main header navigation – apart from a link to your dedicated contact page, you can add your telephone number/email address to make it easier for users to get in touch with you.

3. In your footer navigation – you can add a short contact form or your telephone number/email address in the footer so that it’s always visible to users.
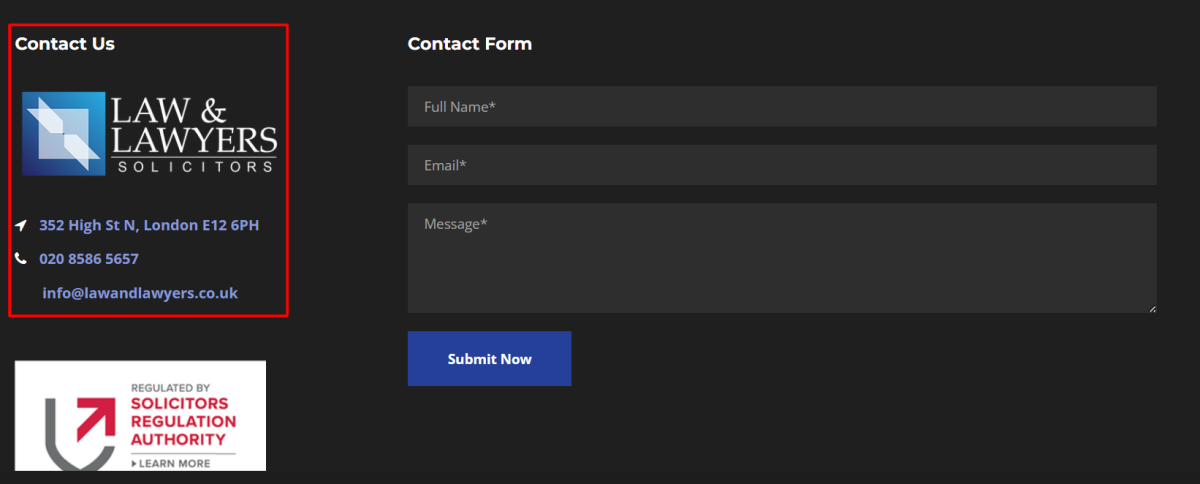
💡Top Tip: when adding telephone numbers and email addresses, always remember to make them clickable. This is especially important for your mobile website as it means that users can simply click the contact information to call or email you instead of having to highlight, copy and paste the number/address.
Quality raters are also instructed to look for customer service information – which relates to things like shipping information, returns and payment policies etc.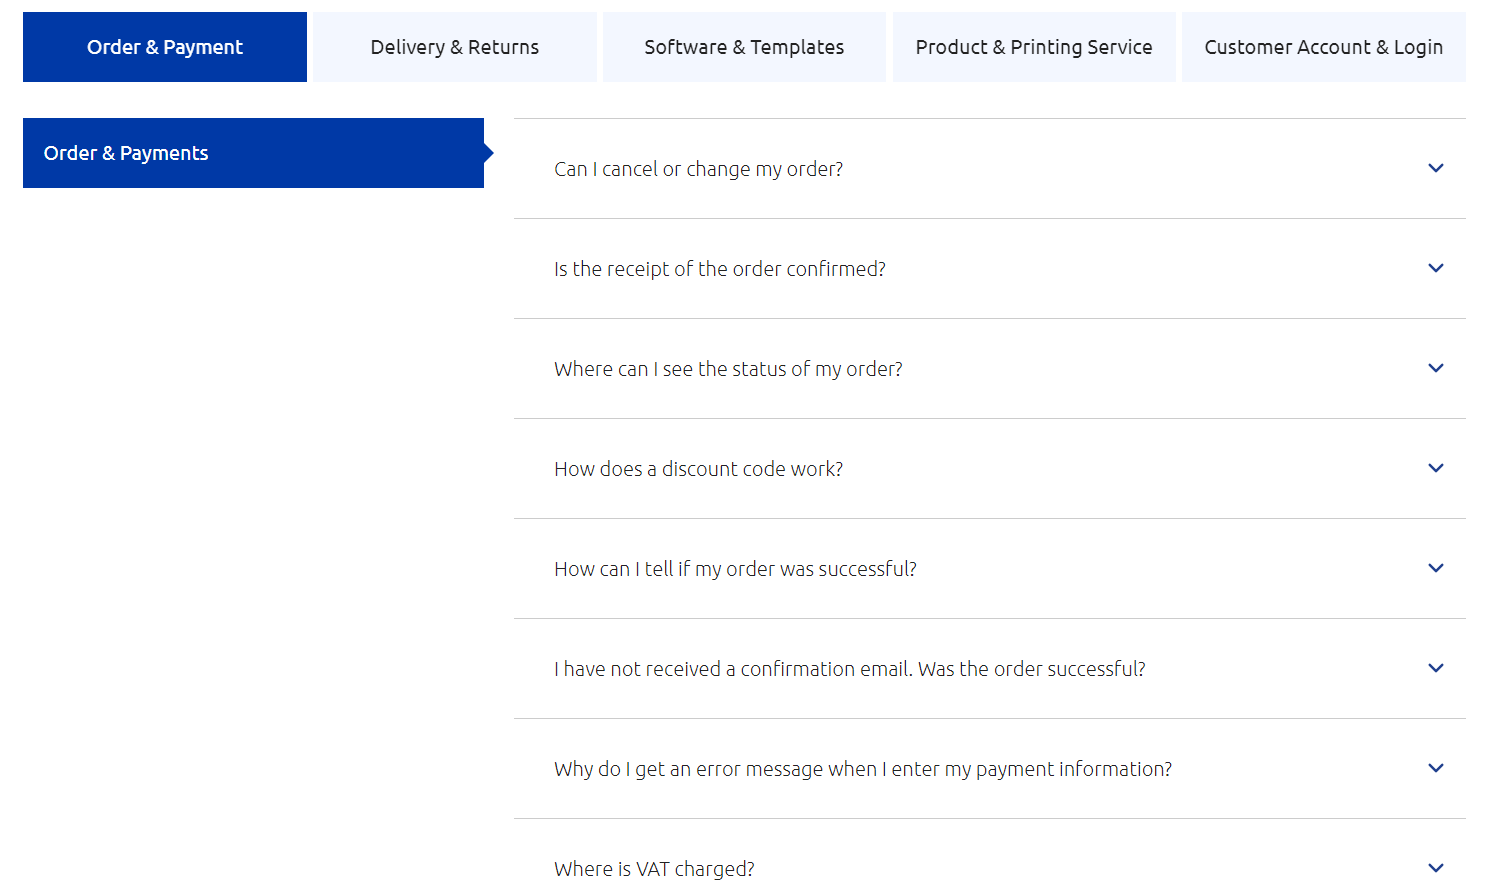
Adding this additional information not only builds your credibility as a business, but also improves the user experience as it means that your audience can find this important information without having to contact you.
This also in turn, saves your team’s time in having to deal with calls/emails from users asking the same questions.
Optimize Your About Us Page
The About Us page is something that crops up regularly in Google’s guidelines as a means for Google’s raters (and users) to identify important information about the website and its content creators’ E-E-A-T.
Therefore, as website owners, the About Us page is your chance to provide as much information about your business’s story as well as the experience and expertise of the people behind your brand.
Here’re the kinds of things you should include in your About Us page:
Your brand (or website) story – talk about the history of your business, who started it, why it was started etc.

Flash your credentials – this is the place where you can show off your credentials. Have you/your team won any prestigious awards, do you have any respected industry accreditations, what about qualifications or case studies that help showcase your experience and expertise within your niche?

Who’s behind the company – add details about the people behind your company/website i.e. if you have a law firm, include information about your team and their respective specialisms. You should also add links to their social media profiles, their individual email addresses and a headshot to further build their credibility and authority.

Make It Clear Who Wrote the Content
Apart from your About Us page, you can also flash your credentials on author bios that usually appear at the top or bottom of blog articles.
The reason for adding this information here is to make it clearer to both Google and your readers that the content is written by someone trustworthy.
Adding the following information to your author bios:
The author’s full name
A short bio of the author’s experience and expertise in the industry
Links to the author’s social media accounts i.e. LinkedIn, Twitter
A professional headshot of the author
Here’s an example of a great author bio:
Show That Your Content Is up to Date
Another signal that establishes you as a trustworthy and credible source of information, is to add signals to Google and your readers that your content is up to date.
This is especially important for YMYL topics (such as medical or financial advice) where regular updates may be required to maintain accuracy in the information being provided.
For example, if you publish reviews of the best smartphones, then users will want to see that the article mentions the latest smartphones on the market.
To show that your content is up to date:
Add a last modified date – in addition to the publication date, you can let users know when the article was last updated.

Optimize your page title (and headings) – signal the relevance of your content by optimizing the page title and headings on your page. For example, if you’re reviewing the latest smartphones, then you might want to include the current year within the page title.

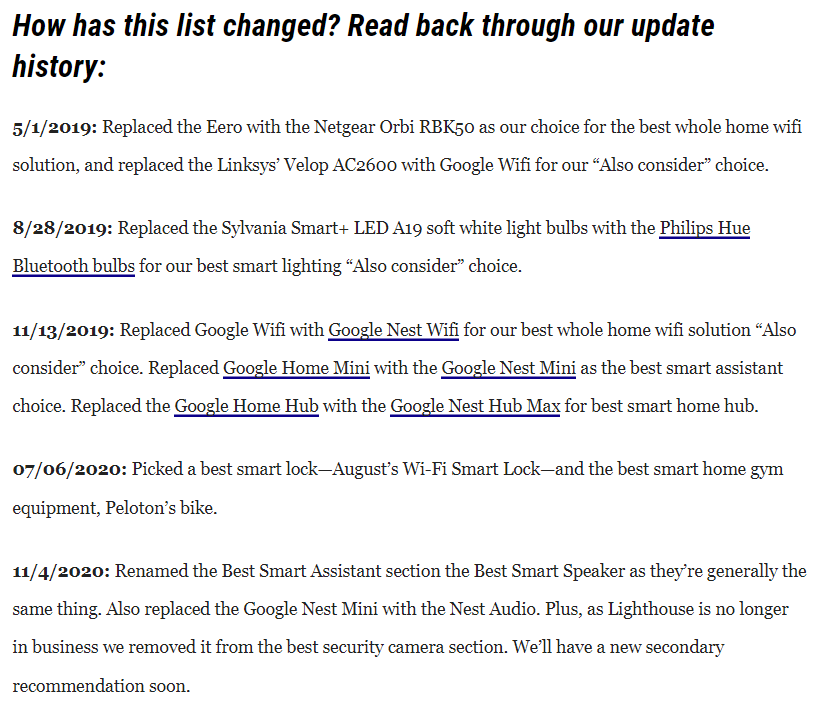
Add an update log – in cases where you need to make significant updates to the same article over time, you can go the extra mile by adding a change history at the bottom of your article. Here’s an example from an article on Gizmodo.
Improve Your Online Reputation
As consumers, one of the main things that we consider when buying a product or hiring a business for service, is its reputation.
Google understands this, which is why it tells its Quality Raters to also use the online reputation of a website as a signal for its E-E-A-T.
Specifically, Google asks its raters to use online reviews as a source of reputation information.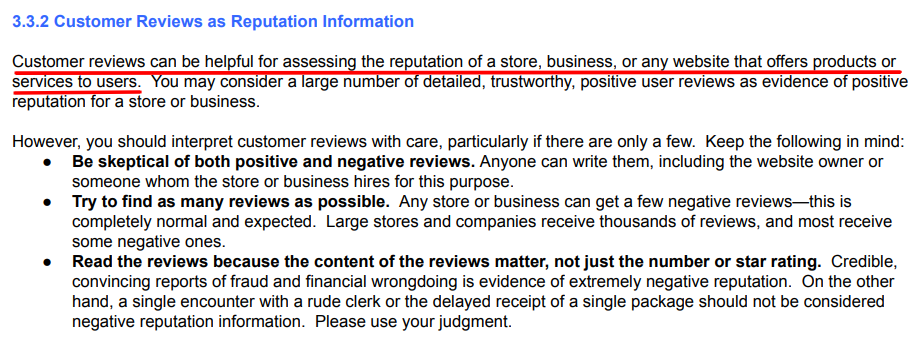
You should therefore focus on getting more (positive) online reviews through as many sources as possible i.e. Trustpilot, Google Reviews etc.
Importantly, your reviews should also come from websites that people within your industry use as a source of trust. For example, if you have a restaurant, then you should aim to get more reviews on TripAdvisor and if you’re a tech startup that sells a brand new earphone, you may ask for websites like TechRadar to review your product(s).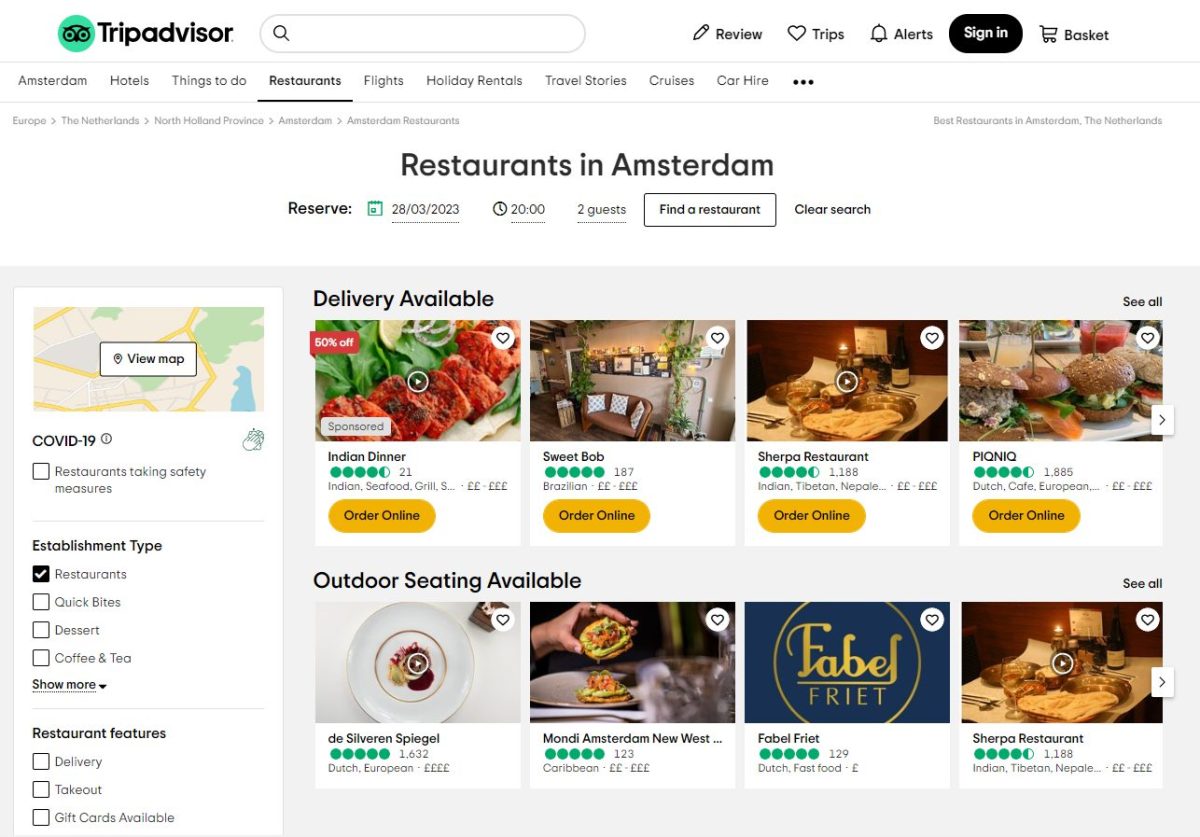
Following all of the above tips will help ensure that you’re positioning your website as an authority within your industry to both Google and your audience.
Content Strategy
Below is the two-pronged content strategy that we executed for this client – focusing on two main goals:
1. Optimizing the product descriptions to compel users to make a purchase when they land on a product page.
2. Increasing the topical authority of the website as the go-to source of information for the health products that they sell (and in turn, increasing keyword visibility for informational search queries).
Optimizing Product Descriptions
While getting lots of eyes on your pages is the goal of SEO, from a business perspective, it’s all about conversions. In other words, are the people landing on your page placing an order, calling you, or converting in some way after landing on one of your pages?
For eCommerce sites, the product pages are where you’ll need to convince users to click through and make a purchase.

The way to do this is with well written product descriptions that compel the user to buy. This is something that the client’s core product pages were lacking before the site migration.
Let’s break down what makes great product descriptions that are enticing for users, but are also optimized for search engines…
Keep Your Target Customer In Mind
If you write product descriptions with your target customer in mind, you’ll make it much easier for you to convince them to choose your product over a competitor.
For example, if you’re a headphone manufacturer that sells varying models of over-ear headphones, you may have the following types of buyers:
1. Casual Listener – someone who wants a pair of headphones for work or for casual use
2. Audiophile – an audio expert or professional who is interested in having the best possible sound quality
So, you may target your lower end headphones to the casual listener, who might care more about design and durability, While your higher budget headphones may be targeted towards the audiophile, who cares more about sound quality.
Based on this, you might use language like “great for everyday use” in the description of the lower end headphones and use more technical vocabulary to describe the sound quality for the more experienced audiophiles.
In addition to this, not all products require the same level of detail as others because of buyer awareness.
Customers with a high buyer awareness will already have a good understanding of the product and why they need to purchase it, so you won’t need to add lots of content.
In the example below, Nike have only included one paragraph to describe the fleece along with a few bullet points about the color and style.

This is because users don’t want to read hundreds of words of content about a fleece. If they like the design, they only need to know whether the product is available in their size or not.
However, products with low buyer awareness require more information in order to convince users to buy. Here’s an example:
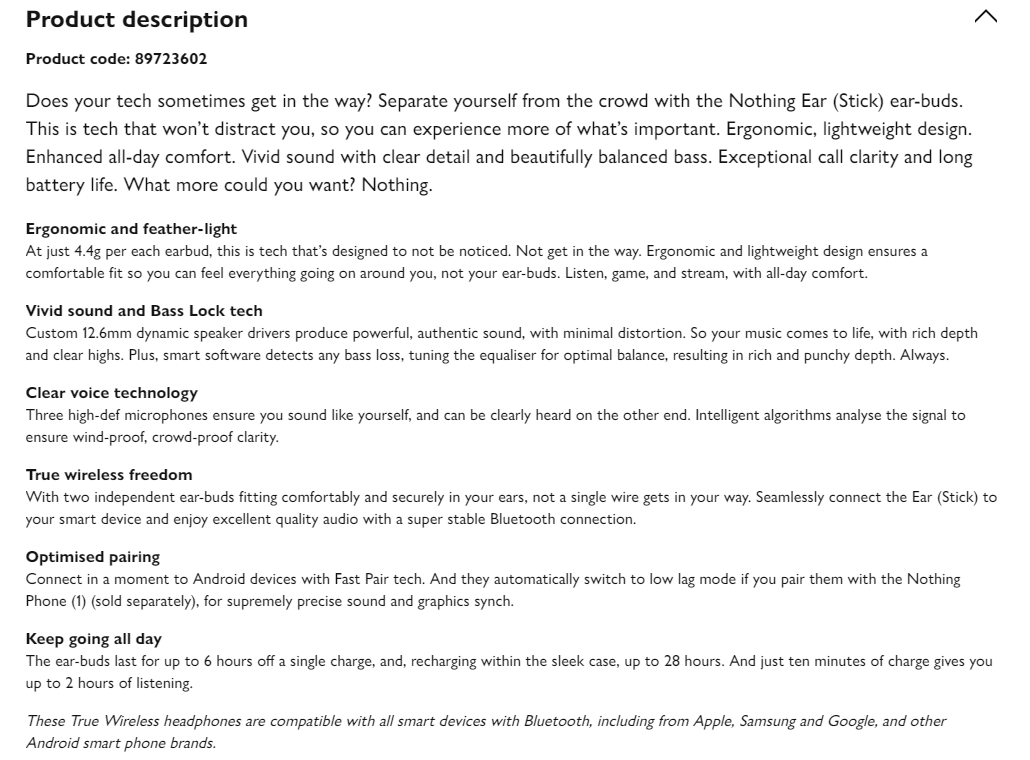
These headphones are more of an investment, which is why this site has gone into much more detail about the features.
They’ve also added a full section about the technical specifications:
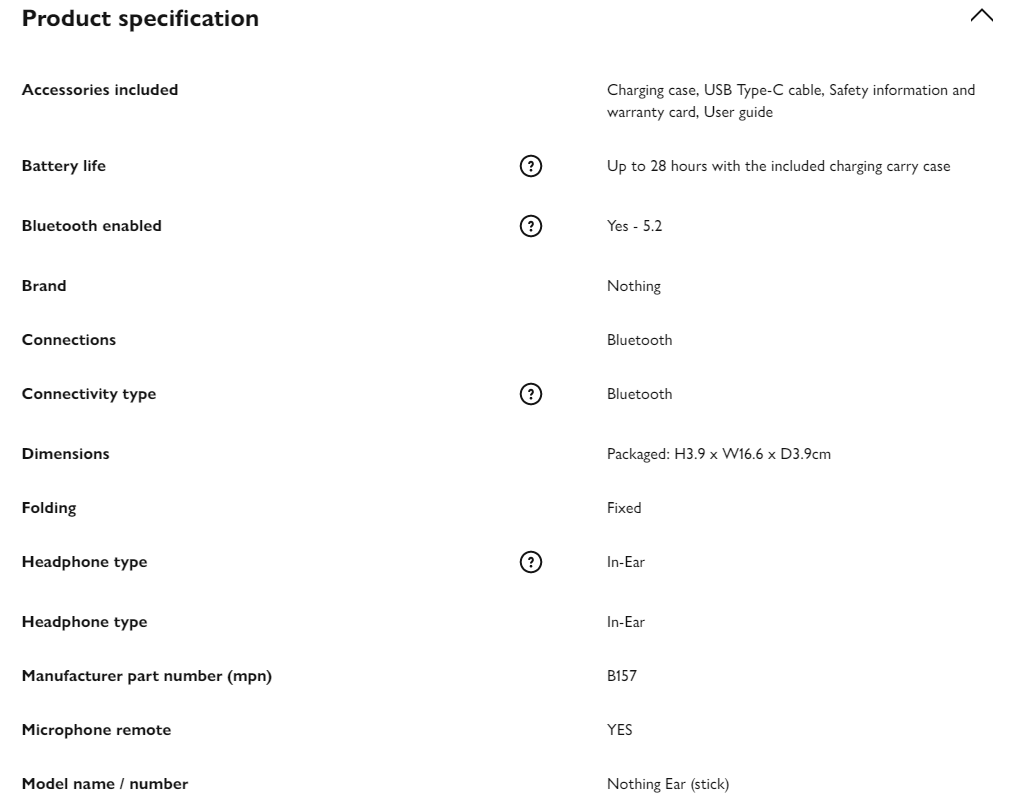
When writing your own description, it may make sense to combine the two so that you are targeting customers with both types of awareness.
Here’s an example of how you can do this…
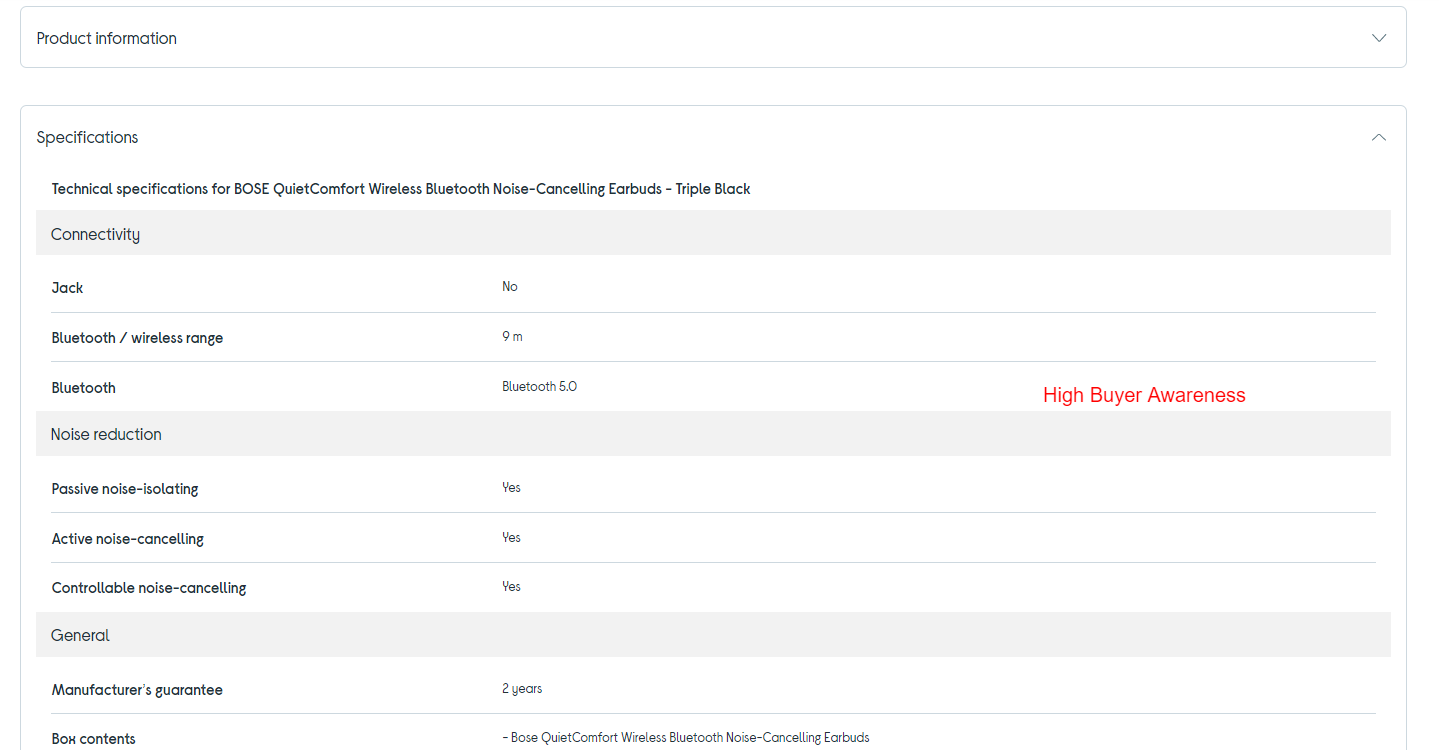
You can target high buyer awareness by bullet pointing key features of the product.
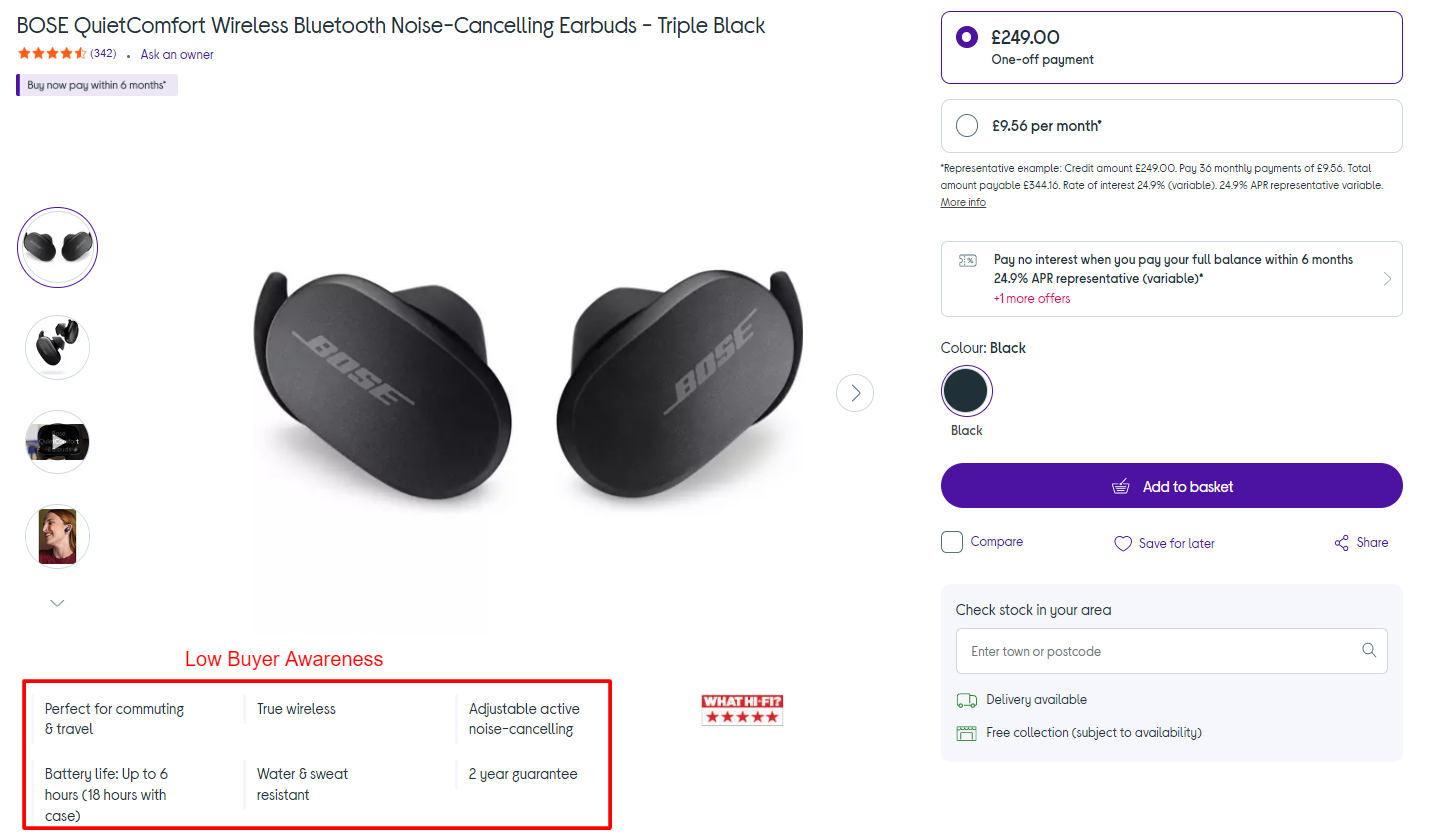
And low buyer awareness by going into more detail about the features and specifications.
Be Informative
Considering that users can’t touch or see the product in person, it’s important to be as informative about the product as possible.
Apart from the essentials like the product name, pricing, availability, you should also add:
Key Features & Benefits – what are the key things that you want users to know about your product? How will your customers benefit from buying your product instead of your competitors?
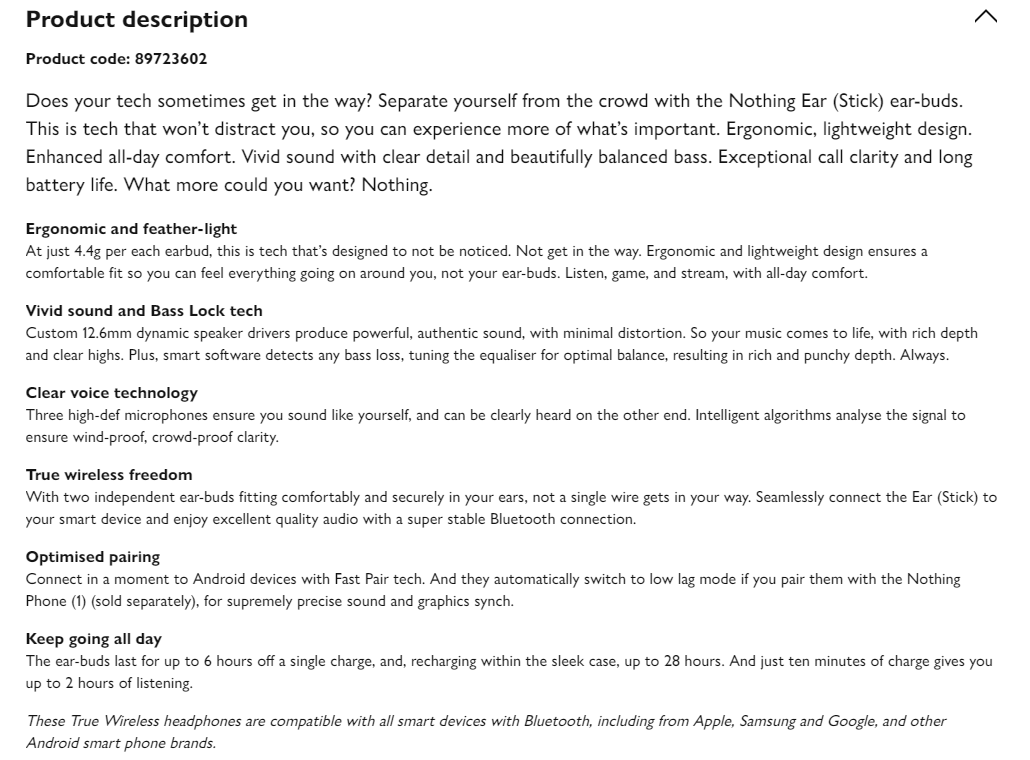
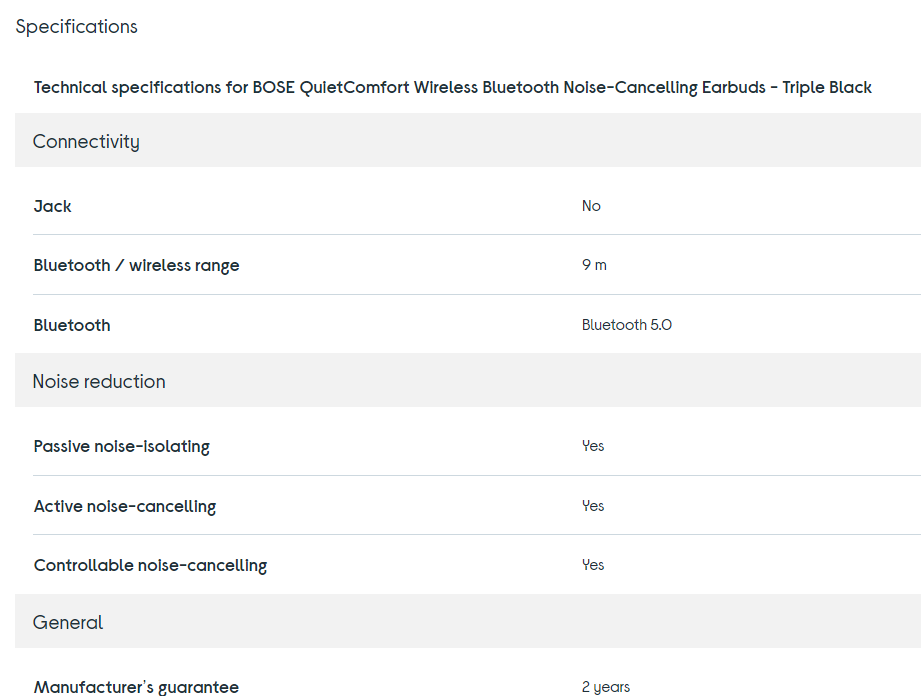
Technical Specifications – are there any pieces of technical information that users should know about your product
Instructions – if your product requires setting up or maintenance, include step-by-step instructions on how to do this.
FAQs – answer any frequently asked questions that customers may have about the product.
Make Sure Your Descriptions Are Unique
One of the biggest mistakes you can make when writing product descriptions, is to use the same description or content that’s provided by the manufacturer or copying the description from another site.
This is because Google isn’t a fan of duplicate content at all, and if all of most of your descriptions are the same as other websites, then you’ll struggle to rank.
Here’s a description that is taken directly from Sony’s website about one of their TV’s:
And here’s an eCommerce website that has directly copied all of the information about the TV’s features from Sony’s original description:
There are also over 10,500+ more URLs that contain the exact same sentence:
And it comes as no surprise that the website that copies the features completely is only ranking for 1 keyword in the UK – and it isn’t even related to Sony TVs.
To avoid cases like this on your website, make sure that your product descriptions are unique and that they offer additional value to the end user.
Organization Is Important
The final tip for optimizing your product pages and their descriptions is to organize the content in a way that makes it easy for users to read and find.
How you structure your descriptions is just as important as the copy itself.
Here are some example of how you can do this:
Headings & Subheadings – use clear headings and subheadings to convey important pieces of information. This makes it easy for users to find what they’re looking for and navigate your page.
Ordered & Unordered Lists – use bullet points or ordered (numbered) lists to present users with easy-to-digest pieces of information about the product. For example, you could use these to list the benefits of your product.
Images and Videos – It’s good practice to include as many images and videos on your product as you can. Show it from different angles and ideally in use. This way, your prospective customers can get a better understanding of the product and in turn, be more inclined to buy.
Tables – You can include tables to convey information like the technical specifications or even comparisons to other models that you offer, helping users to make a more informed decision on which product is best suited for their needs.
Following these steps will help ensure that your product descriptions are compelling and enticing enough to turn organic visitors into paying customers.
Building Topical Authority With Power Hubs
Topical Authority pertains to a website’s perceived expertise in a specific niche or subject, indicating to Google that the website possesses an in-depth comprehension of the subject matter and can be considered trustworthy.
Establishing topical authority is crucial for enhancing your E-E-A-T and consequently, obtaining a higher rank in the SERPs.
The client’s website lacked informational content that showcased their authority within their niche which also meant that they were missing out on ranking for lots of informational keywords.
The second part of our content strategy for this campaign therefore, was to build topical authority and increase visibility for informational search terms by publishing Power Hubs.
What Are Power Hubs?
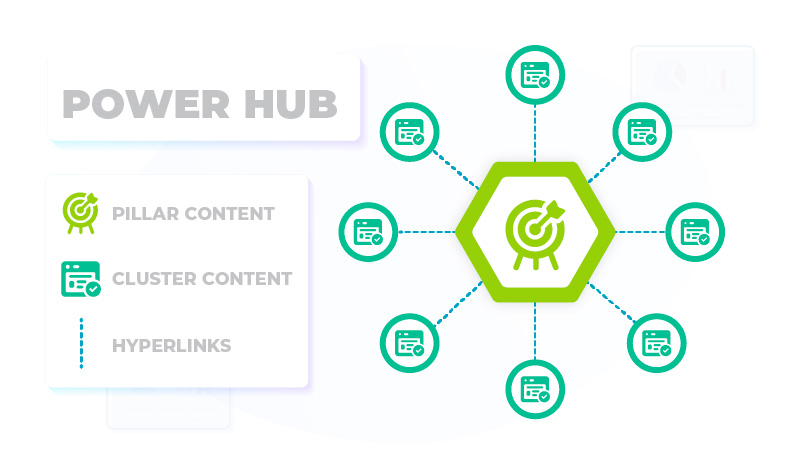
Power Hubs are collections of content consisting of a central pillar page that is supported by a cluster of supplemental pages, all of which are thematically related.
These pages are interconnected via hyperlinks (aka internal links) with the pillar page linking to each of the cluster pages, and vice versa.
Power Hubs are great because they:
Increase your visibility for keywords that have an informational or commercial intent
Build brand awareness and stamp your authority as the go-to source within your niche or the particular topic that you’re covering.
Offer an opportunity to create linkable assets that users will want to share.
Attract users who are interested in the topics that you write about and keep them on your site longer through the use of internal linking.
Give your site more chances of ranking as you aren’t just relying on a single long blog post to rank. In other words, you aren’t putting all of your eggs in one basket.
Finding Potential Topics for Power Hubs Using Ahrefs
I’ll show you how to find potential topics for Power Hubs using Ahrefs’ Keywords Explorer tool.
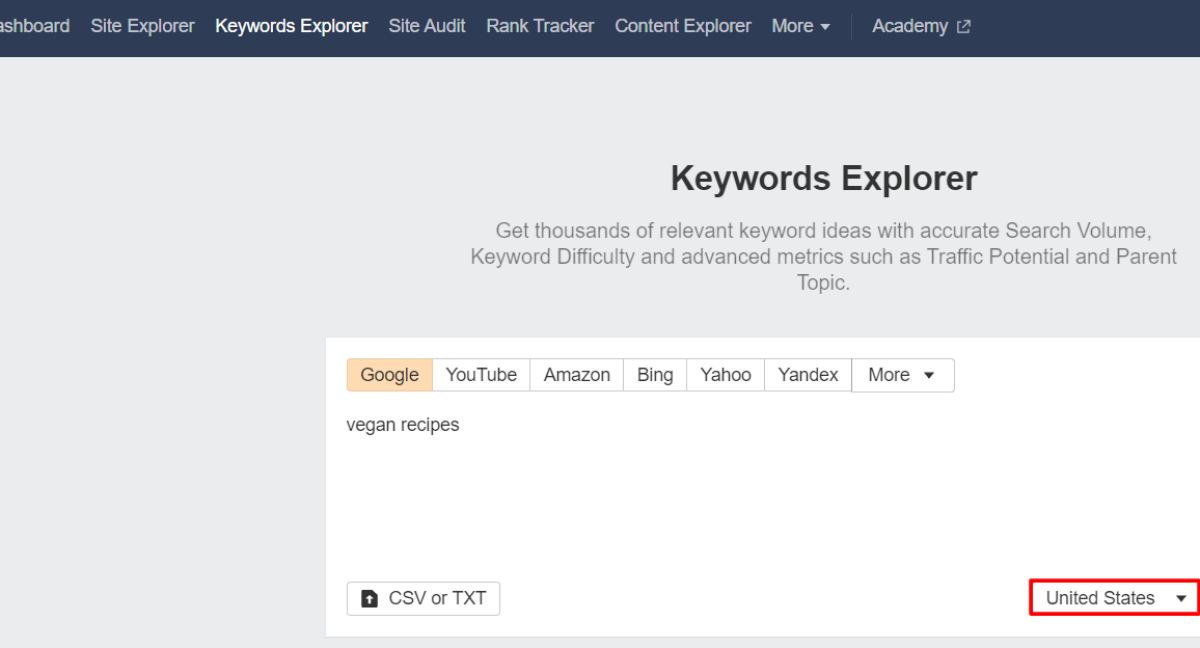
1. Search for a broad keyword that is relevant to your niche. For example, if you had a website that publishes recipes, you might search for “vegan recipes”. Remember to select the location that you want to target.
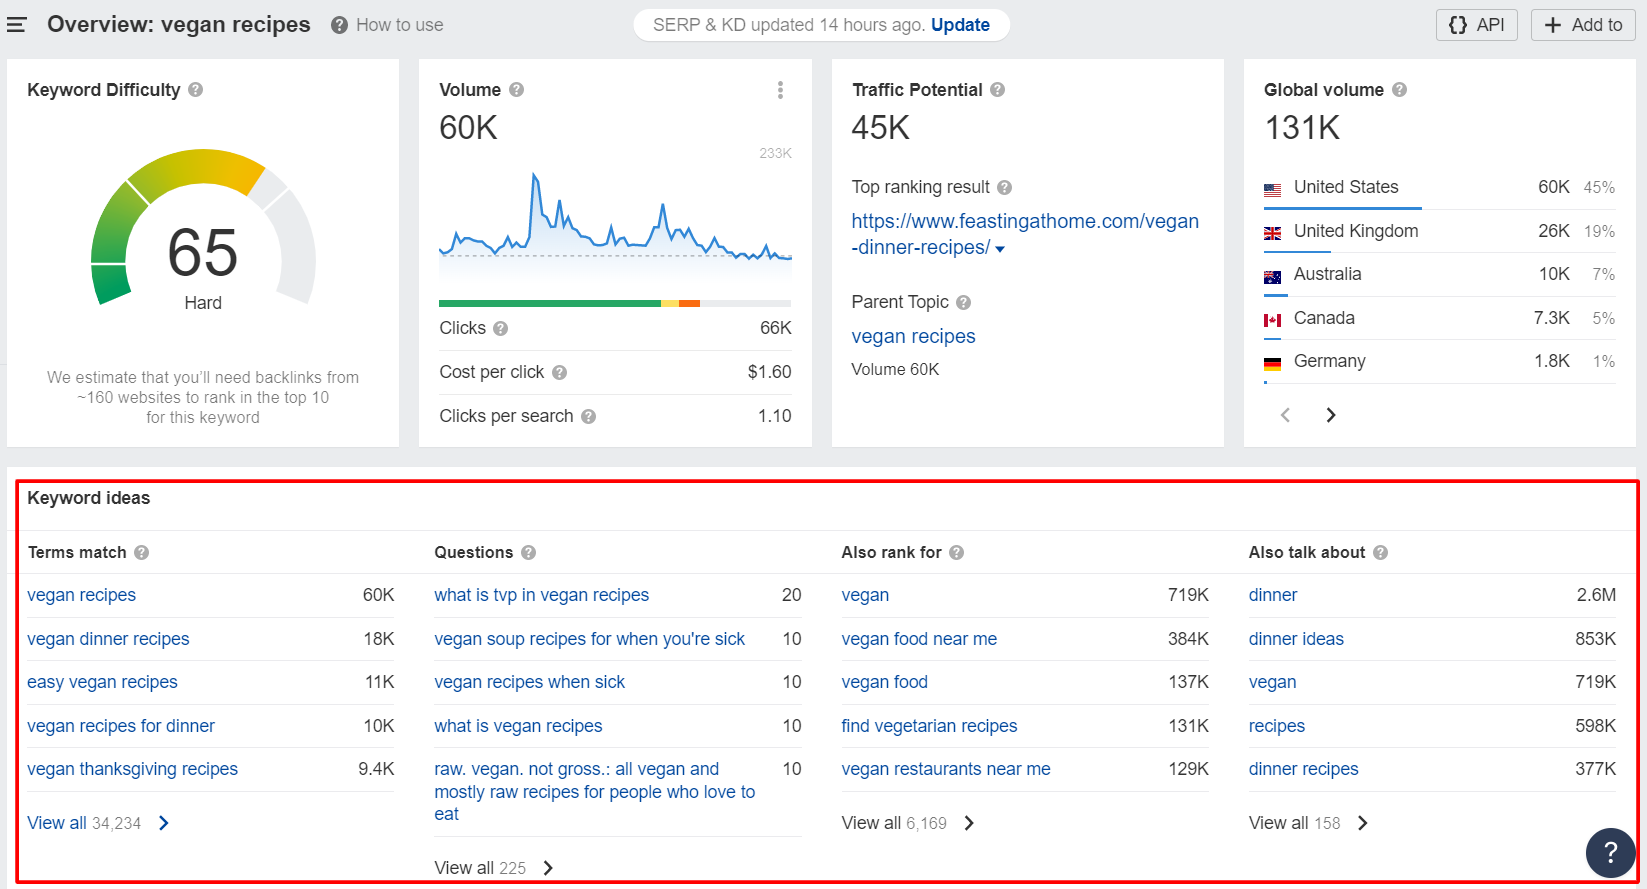
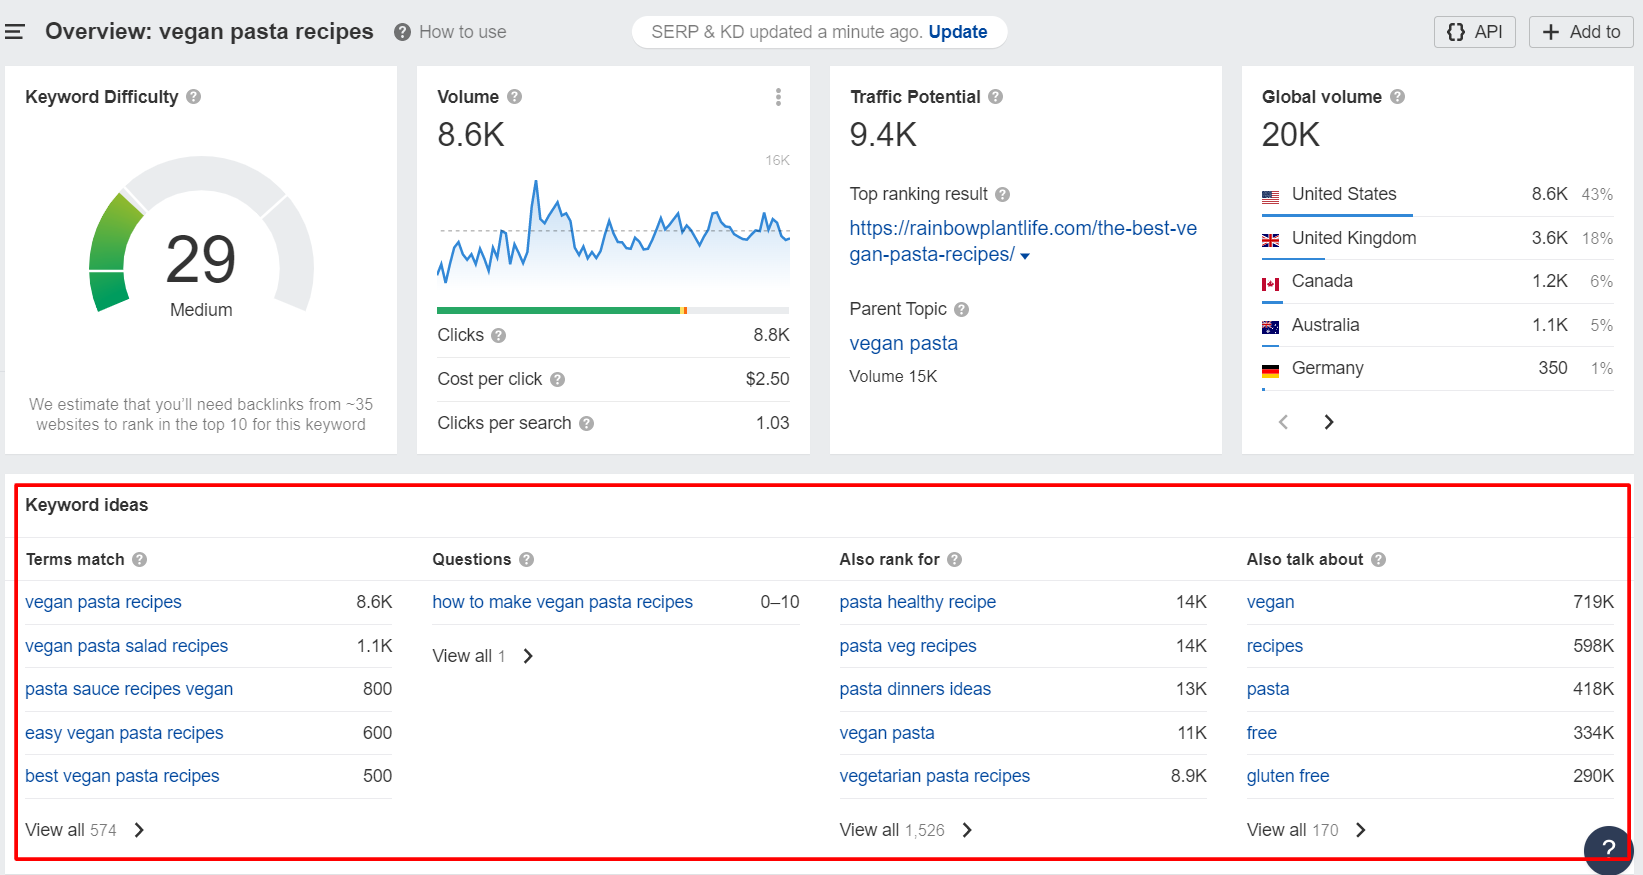
2. The Keyword ideas section displays a range of additional related search terms that you can target.
- Terms Match – keywords that include your original seed keyword.
- Questions – keywords related to your seed keyword, but are phrased as questions.
- Also rank for – keywords that the top 10 pages of the seed keyword are also ranking for.
- Also talk about – additional topics and search terms that the top 10 pages of the original seed keyword mention on a regular basis.
3. Open the Terms Match report to find ideas for your pillar page (this is the central page in your Power Hub).
💡Top Tip: use the Group by Terms filter on the left hand side to see topically-related keyword clusters that contain similar (or common) words. This is a great way to find your core topic for the pillar page. Let’s look at the opportunities for “pasta”.
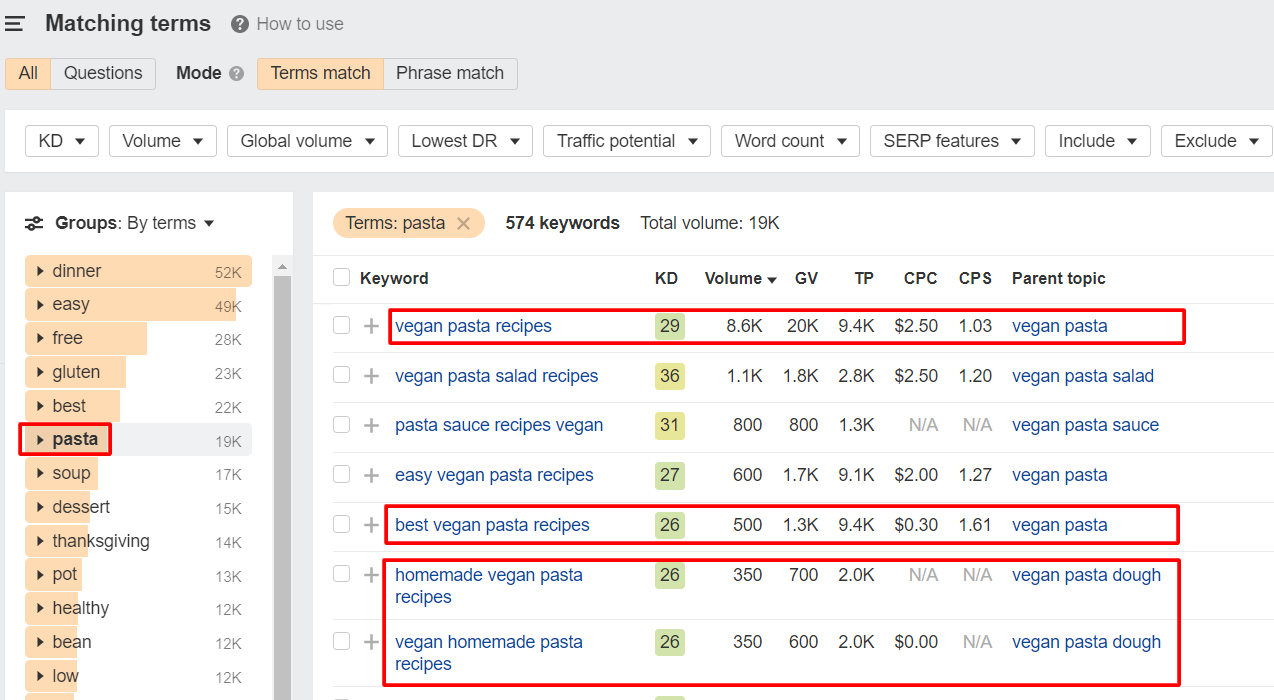
There are many keyword variations related to “vegan pasta recipes”- making it a great keyword choice for our pillar page. This is because the pillar page should target a broader topic (“pasta recipes”) while cluster pages target more specific subtopics.
4. Repeat the first two steps to find the topics for your cluster pages. This time, use the target keyword of your pillar page i.e. “vegan pasta recipes” as the seed keyword.
5. Click the Terms match report again to identify keywords that you will target on your cluster pages.
Use the groups in the left sidebar to help you identify subtopics.
Without even clicking on any of the groups from the left sidebar, you can start to spot certain keyword groups and topics for your cluster pages.
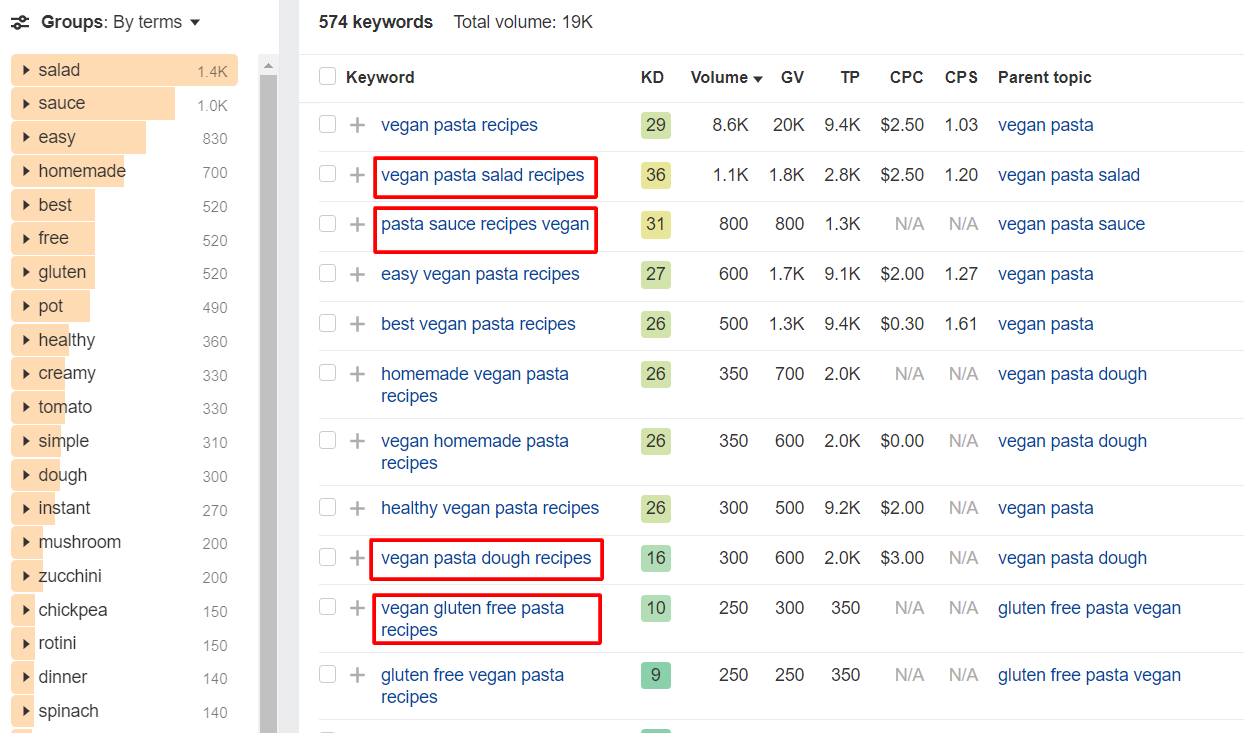
- Vegan Pasta Salads – “vegan pasta salad recipes”
- Vegan Pasta Sauces – “pasta sauce recipes vegan”
- Vegan Pasta Doughs – “vegan pasta dough recipes”
Each of the above could be a cluster page that goes into detail about the various styles and components of vegan pasta making.
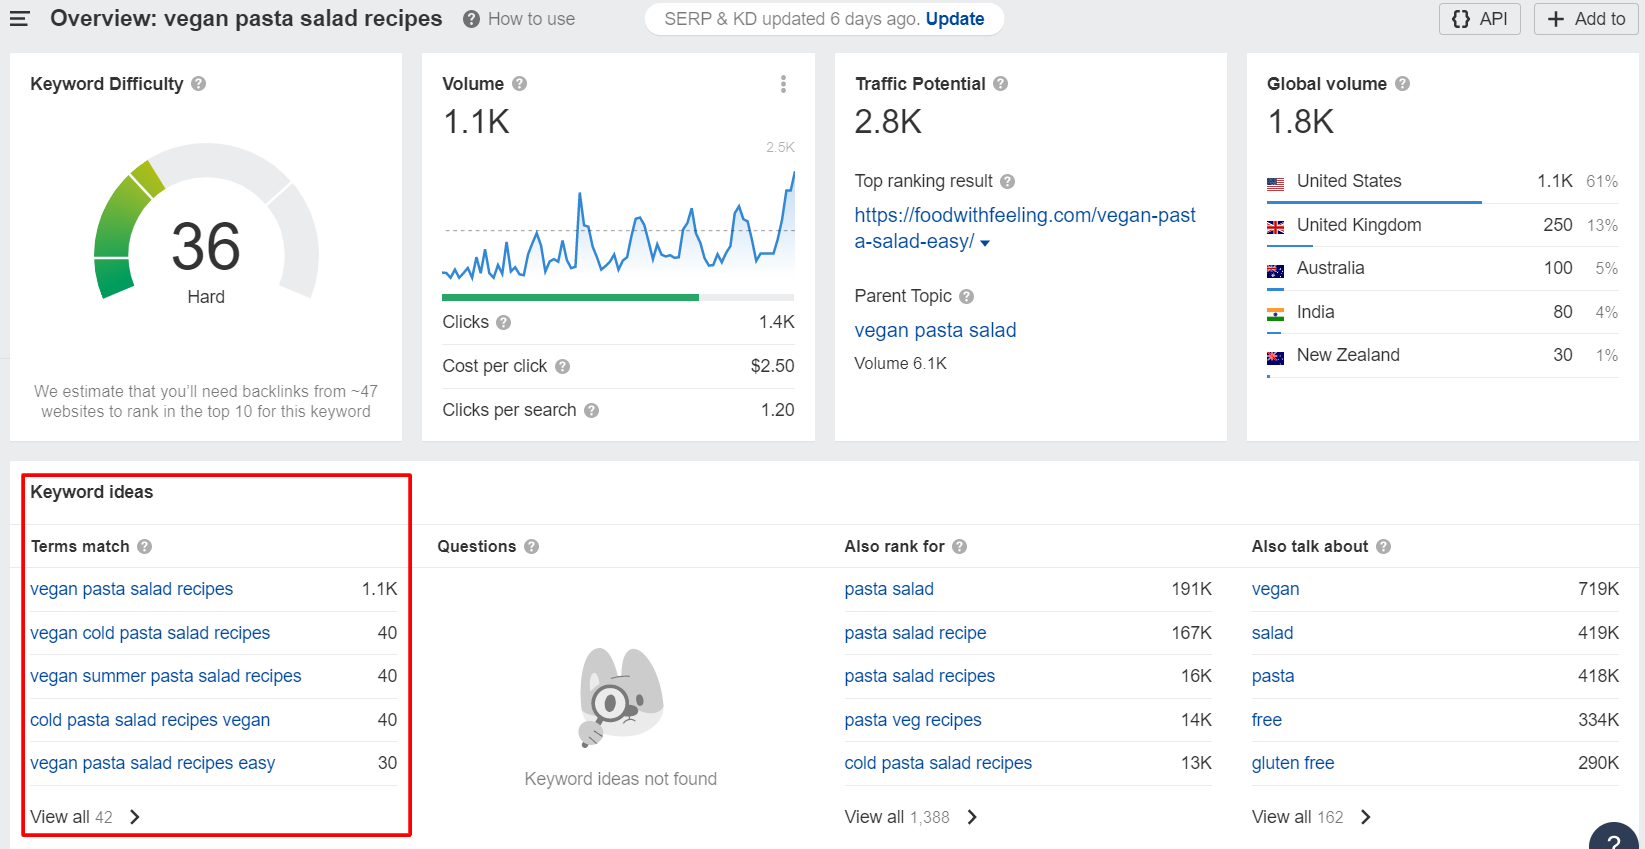
6. Once you’ve identified the keywords that you want to target, you can find even more keyword variations to target by using Ahrefs’ Keywords Explorer tool.
For example, there are 42 related keywords that you can target for “vegan pasta salad recipes”.
Writing Content For Your Power Hubs
Here’s how you should approach writing your Power Hubs:
1. Search your target keyword in Google (i.e. “vegan pasta salad recipes”)
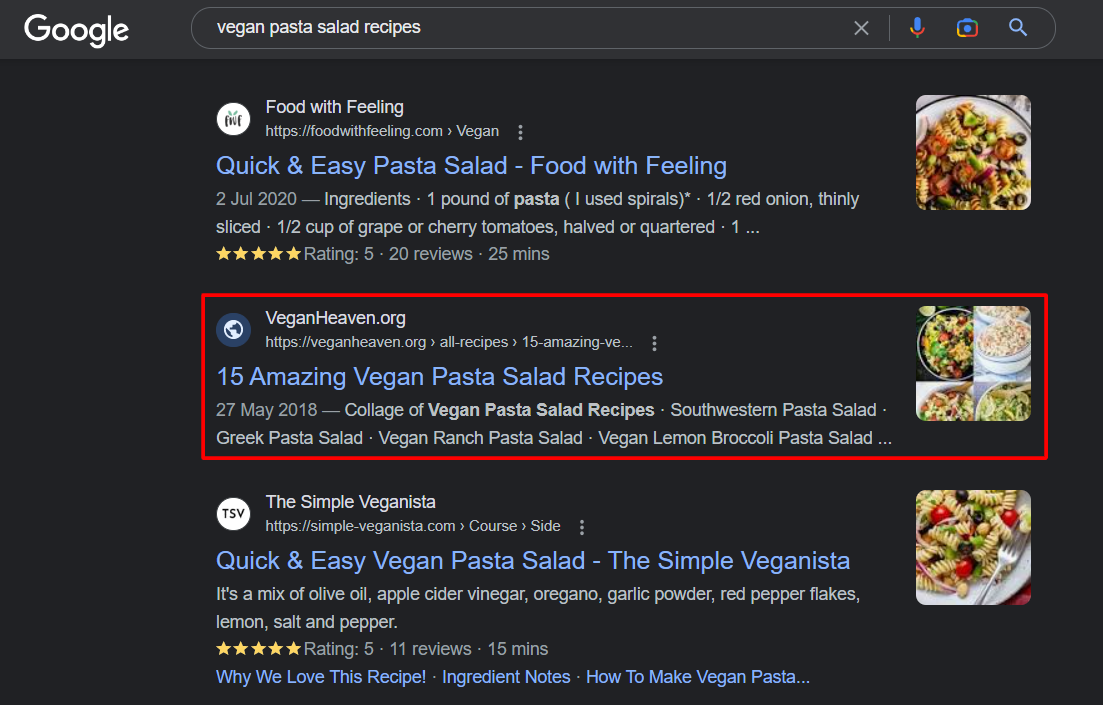
2. Analyze the content that the top ranking pages have included and pay close attention to:
What kind of headings they’ve used to structure their page
The level of detail that each section goes into
Whether they have included other types of content like images, examples, infographics, videos, calculators to enrich their page
Your content should align with what Google is already rewarding in the top spots, but that doesn’t mean that you shouldn’t include additional information or content that they haven’t included.
In addition, your content should be:
Structured with clear, descriptive headings and ideally a table of content to make it easier for users to find what they’re looking for.
Formatted using a range of techniques to present information in a way that is easy to read i.e. use bullet points, ordered/unordered lists to organize information
Unique to avoid any duplication
3. Remember to optimize on-page elements of the new pages for the main keyword that you’re targeting:
- Page Title – write an engaging title that summarizes what the page is about and includes your main keyword.
- H1 Heading – summarize your content with an attention grabbing H1 heading that also includes your core keyword
- Meta Description – meta descriptions aren’t a ranking factor, but they can be the difference between a user clicking onto your page instead of your competition. Therefore, it should convey what the user can find on the page.
Implementing Internal Linking
One of the benefits of Power Hubs is the fact that it presents lots of opportunities to implement internal linking. This is where you add links from one page on your site to another.
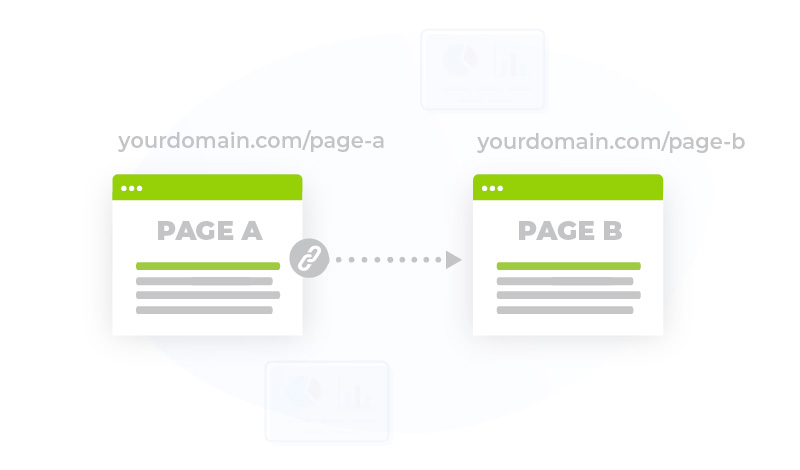
Adding internal links to relevant pages on your website is a great way of guiding users towards important pages on your site and gives Google a better understanding of how your website is structured.
Here’s how you should structure the internal linking for your Power Hub:
Pillar page of your Power Hub → to the cluster pages on the Power Hub
Pillar page of your Power Hub → to any other relevant landing pages on your site
Cluster pages in the Power Hub → to the pillar page
Cluster pages in the Power Hub → to other cluster pages in the Power Hub
Cluster pages in the Power Hub → to other relevant landing pages on your site
Other relevant landing pages → to the pillar page
Other relevant landing pages → to the cluster pages
Following the above will create a network of links for Google and users to follow.
HARO Link Building Strategy
Google’s PageRank algorithm, which was created by the search engine’s co-founders Sergey Brin and Larry Page in 1997, uses links to measure the importance of a page.
It’s for this reason that link building is and always has been such a big part of SEO.
An effective and increasingly popular strategy for building backlinks is with HARO.
How Does HARO Work?
HARO (Help A Reporter Out) is a platform that connects journalists who are looking for information on a particular topic with relevant sources who are willing to provide that information.
The journalists are from all kinds of publications that include the likes of The New York Times and Forbes to niche-based bloggers.
This makes it a treasure trove of link building opportunities that you might not get otherwise.
Here’s a breakdown of how HARO works:
1. Sign up as a source..

2. Fill out the relevant information
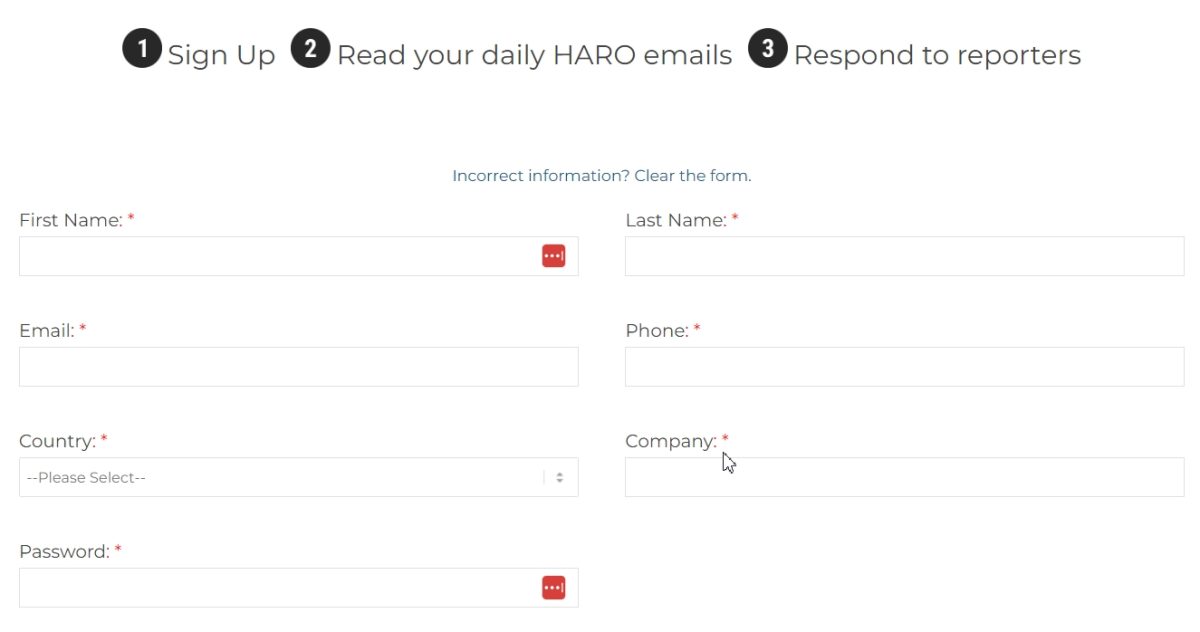
3. Monitor the emails that get sent to your inbox – three emails are sent every day from Monday to Friday at 5:35 a.m., 12:35 p.m. and 5:35 p.m. ET. Below is an example of how the emails are structured:
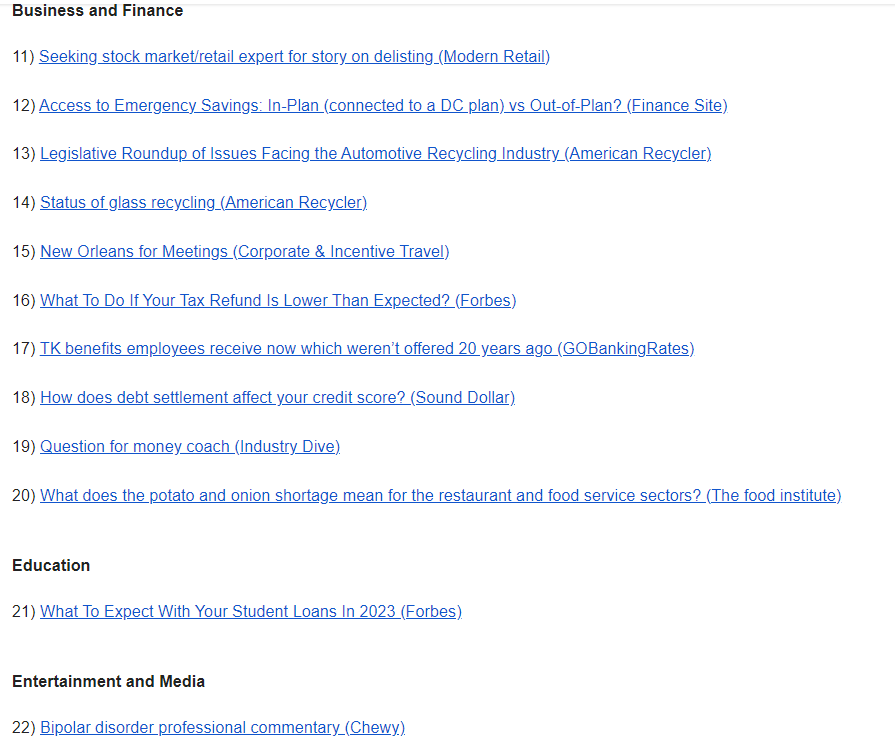
4. Each request has a title and an outlet (the publication) in brackets. Clicking on any of the requests will expand and provide more details about what the journalist is looking for.
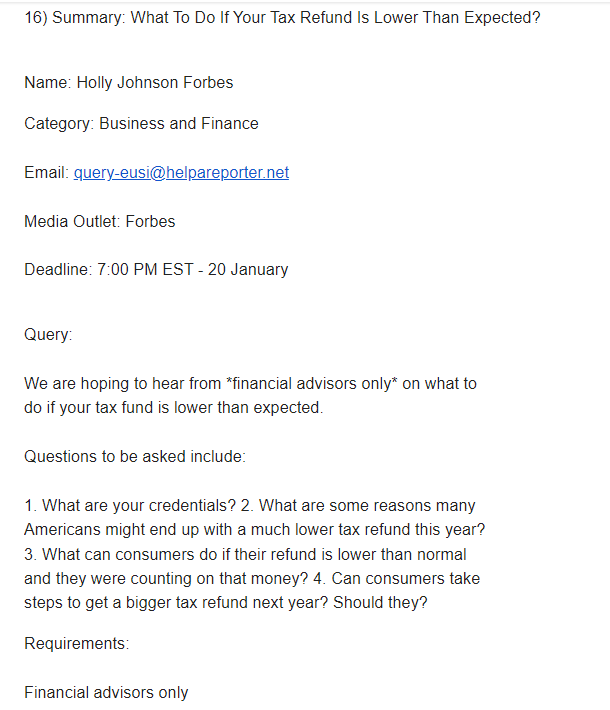
The query summary includes the:
Journalists’ contact details
Media Outlet
Query topic
Query requirements
Deadline
5. Pitch to the journalists requesting information about your chosen topic using the contact details provided. Ensure that your pitch is aligned with the criteria outlined by the journalist.
Tips on Using HARO For Link Building
Choose Relevant Queries to Pitch To
The journalists’ requests are ordered by category e.g. Business and Finance, Education etc, which makes it easier for you to spot the queries that are most relevant to your niche.
You should make sure that you only respond to queries if:
You are qualified to respond to it.
Are relevant to your industry.
You’ve read and understood the guidelines carefully.
You’re able to add unique value to them.
Set Up Filters & Alerts
With a free HARO account, you can set your preferences on what kind of requests you’d like to receive.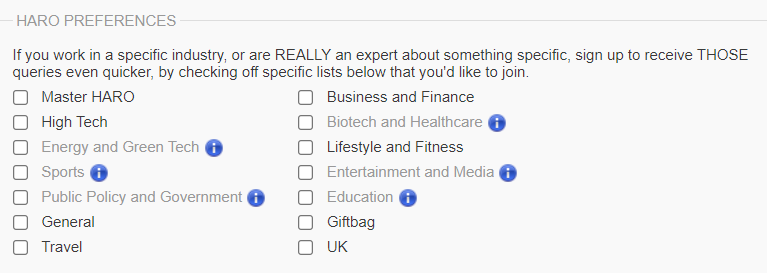
However, with an upgraded HARO subscription, you can:
Filter the requests further by setting up an alert to match an exact keyword, e.g. insurance, or SEO.
Set up SMS alerts (US only)
This way, you’ll receive requests that are relevant to you and you won’t have to trawl through hundreds of irrelevant requests.
Considering that journalists can receive hundreds if not thousands of pitches (depending on the publication they are writing the article for), setting up alerts allows you to be proactive and quickly respond to the requests.
This is especially important for cases where journalists set same-day deadlines to avoid being swamped with irrelevant pitches.
Filter Domains You Want Links From
Apart from sending your pitches to relevant journalist requests, you also need to make sure that the publication is one that you actually want to be published on.
It should also have SEO value.
You can use Ahrefs’ Site Explorer tool to check out important stats like the website’s traffic and backlinks.
Here’s an example: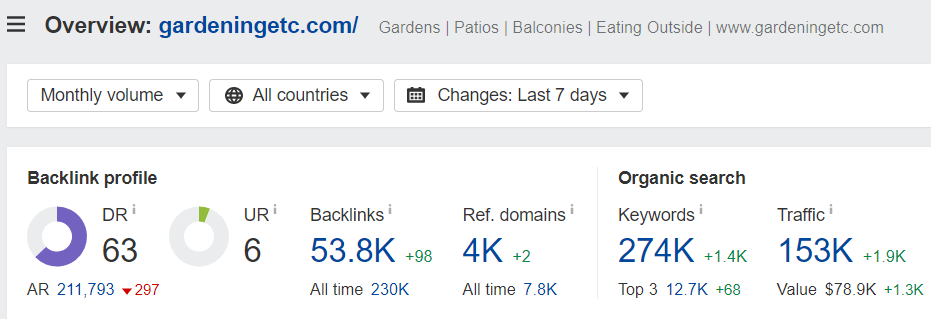
This site is ranking for over a quarter of a million keywords and has an estimated 150k+ monthly visitors.
In general, your focus should be to get a backlink from a site that has huge visibility (ranks for a lot of keywords), but also adds value to your target audience. This way, the backlink will drive relevant traffic and qualified leads to your website.
Crafting the Perfect Pitch
HARO now has over 800k users who’ve joined the platform, which means that competition between sources to be selected by journalists is high.
With this in mind, it’s crucial that your pitch stands out and compels the journalist to pick you.
Here are some tips on how to craft the perfect pitch for HARO:
Write a Concise Subject Line – your subject line should make it easy for the journalist to identify your pitch as relevant to their request. Include:
The reference to the HARO category
Your job title
Your expertise
Your query subject
Use separators like brackets or parentheses and backslashes to separate your words. Here are some of the examples:
[HARO Response] Expertise + Query subject
(Media Outlet) Job Title / Expertise + Query Subject
Your job title + Expertise + Query subject (Media Outlet)
Showcase Your Expertise & Personality – To maximize your chances of being selected, you need to show the journalist that you’re an expert in the topic.
In fact, it’s rule number two in HARO’s guidelines for sources: “Sources must have clear, reasonable expertise in a topic relevant to the query they are responding to.”
Your response should be informative and showcase your expertise, but should also be engaging for the end reader.
For example, you can talk about the following in your introduction:
Interesting content that you’ve already written (e.g. books, articles)
Relevant work-related milestones
Relevant contributions to industry development (e.g. have you run any workshops or been on industry panels?)
Make It Unique & Personal – whilst responding to pitches in bulk may warrant the use of a template, it’s still worthwhile taking the time to personalize your pitch by including key pieces of information that are relevant such as the journalist’s name, the publication they’re writing for etc.
Doing so helps establish a longstanding relationship with them and may present further opportunities in the future.
Add Value – ask yourself whether your pitch adds value to what the journalist is looking for. Your pitch should (ideally) offer a unique perspective that goes beyond and builds on content that’s already been published elsewhere. Therefore, it’s good practice to be aware of what is ranked in the search results for your given topic.
Follow HARO’s Guidelines – In addition to some of the points from above, you should avoid:
Spamming reporters with off-topic pitches in response to their queries
Bribing journalists for a backlink
Offering your products or services to journalists (unless the source request specifically asks for it).
Uploading images and attachments
Harvesting any reporter information provided in the HARO emails
Use AI to Help Craft Your Pitch – If you are reaching out for the first time and this all seems daunting, you can use the power of AI to help you craft the perfect outreach message.
You can ask the likes of ChatGPT to write your pitch for you, all you have to do is provide it with a few key pieces of information such as:
1. The fact that you want it to write a HARO pitch
2. What the topic of the journalist’s query is
3. What your specialism is
4. Additional contextual information that is important i.e. whether you want the pitch to mention a previous article written by the journalist
Here’s an example prompt:
And the respective response from GPT: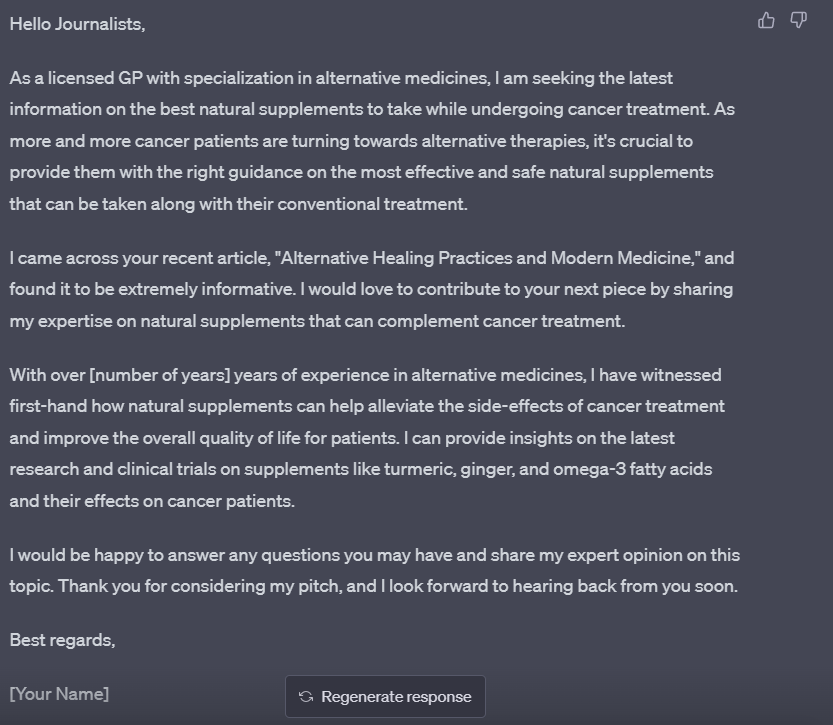
The response provides a great foundation for your pitch, which you can then adapt and edit based on any changes that you feel are necessary. You can also ask GPT to write a subject line for your pitch.
Following the above tips will ensure that your HARO pitches are as successful as possible.
Below is an example of the types of links that we managed to achieve for this campaign: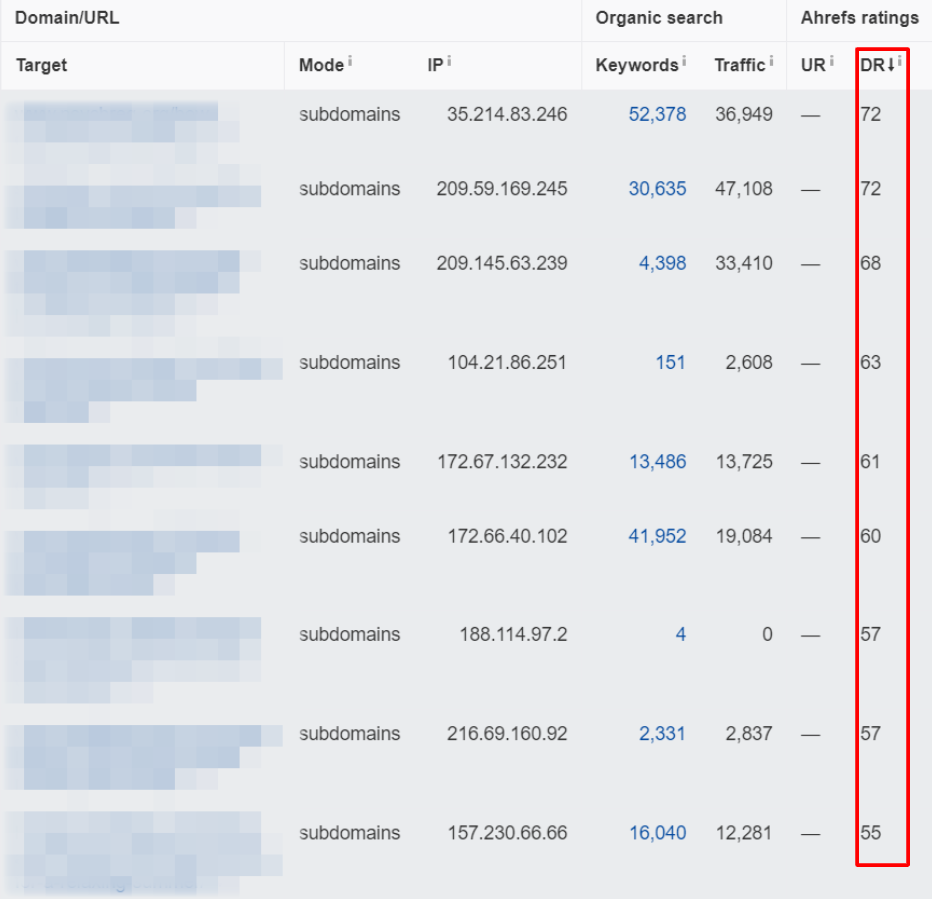
The Results
Here’s what we’ve achieved by executing the above strategies in just over six months.
The organic traffic grew by 60.99% from 4,202 users to 6,765.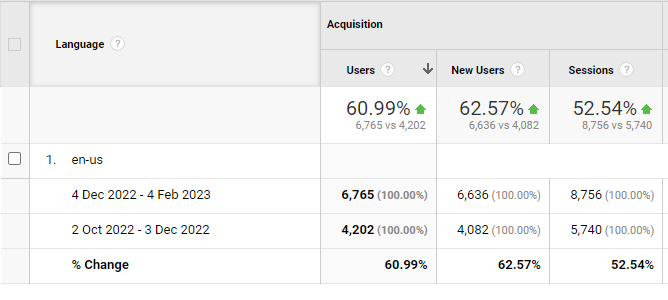
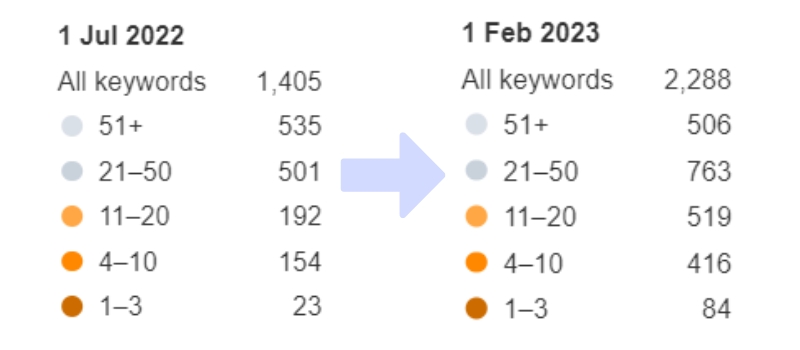
The number of keywords that the site ranks for in the top 100 positions of Google increased from 1,405 keywords to 2,288 keywords – an increase of 188%.
Conclusion
Whether you’re starting a new website with a migration or working on your existing site, I’ve shown you how the combination of content creation and optimization with careful anchor text selection and link building can propel your website’s SEO growth.
In this case study, you’ve learned how to:
Carry out an SEO-friendly site migration from scratch.
Implement E-E-A-T signals to showcase your authority within your niche to both Google and your users.
Write product descriptions that convert.
Build topical authority and improve your keyword visibility for informational queries with Power Hubs.
Execute an HARO link building campaign.
Implementing the strategy above will ensure that your site migration presents as few roadblocks as possible.
Optimizing your product pages by providing as much useful information to your customers as possible will help encourage them to click through and make a purchase. Likewise, publishing Power Hubs to target informational keywords will also help establish your website as a credible source of information within your niche.
If you’re looking for help with your site’s SEO, get in touch with my team at The Search Initiative.
Get a Free Website Consultation from The Search Initiative:
Got Questions or Comments?
Join the discussion here on Facebook.

 Pick a Smart Migration Date
 Crawl Your Existing Website
 Create a Backup of Your Site
 Create a Staging Website
 Map Your URLs
 Migrate Your Content
 Implement 301 Redirects
 Update Internal Links
 Update Your Backlinks
 Update Your DNS Settings
 Request a Domain Change via Google Search Console
 Remove Any Temporary Website Blocks
 Create & Upload Your New XML Sitemap
 Resubmit Any Disavowed Links to GSC
 Check the Performance of Your New Site
 Monitor SEO Performance: Traffic, Rankings Etc
