
To put it simply, if your website’s technical SEO isn’t on point – you’re not going to rank well on Google.
As a professional digital marketer with over 10 years of experience in conducting technical SEO audits, I understand this very well.
Having great content and backlinks isn’t enough when it comes to ranking in the top positions of Google search. If you really want to dominate the search engine results pages, you want to make sure that your website’s Technical SEO is perfect.
Conducting a full technical Search engine optimization audit can be a pretty daunting task.
Lucky for you, I’ve broken down each of these SEO elements and have provided a helpful SEO audit checklist with ready-to-use templates for you to follow.
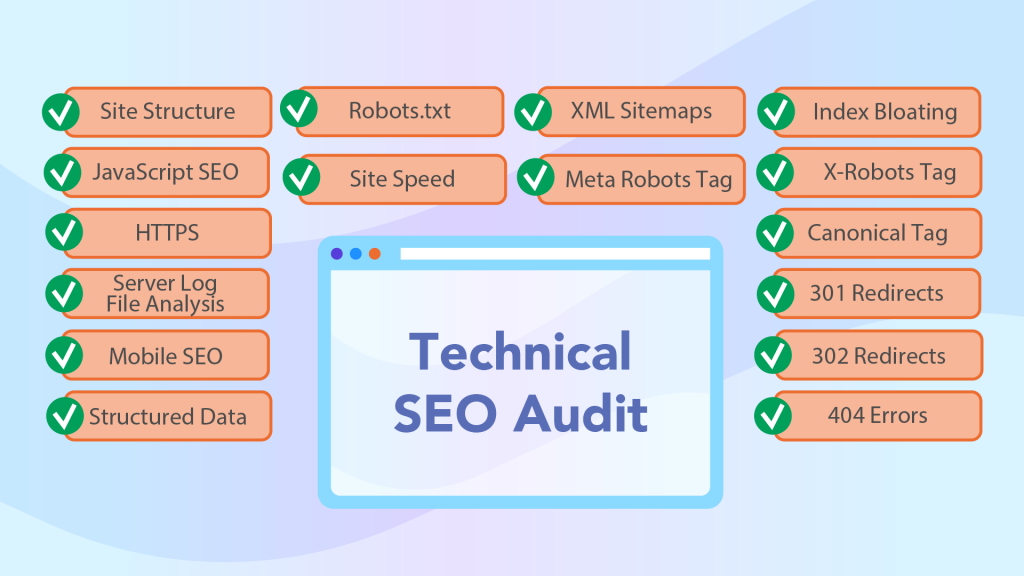
From the most basic level of ensuring that Google can crawl and index your content to more advanced techniques that look into site speed, mobile SEO, JavaScript SEO, and more, I’ll be with you every step of the way.
Table Of Contents
Quick Summary
 A technical SEO audit is a comprehensive examination of a website’s technical aspects that influence its visibility in search engines. It involves checking the website’s architecture, indexing, performance, and security to identify and fix issues that could hinder its performance in search engine results.
- The audit process includes several key steps such as crawling and indexing analysis, website structure evaluation, URL structure analysis, page speed testing, mobile-friendliness assessment, checking for duplicate content, and security checks among others.
- Conducting a technical SEO audit is crucial for improving a website’s search engine ranking, enhancing user experience, and ultimately driving more organic traffic to the site. It’s a continuous process that should be done regularly to keep the website optimized and up-to-date with the latest SEO practices.
What is a Technical SEO Audit?
A Technical SEO audit is a process that is meant to identify and fix the technical issues that could make it harder for Google to crawl, index and rank your site.
and they make life easy for you.
Common issues often discovered during a Technical search engine optimization audit include poor site architecture, broken links, slow page load speed, or display issues on mobile devices.
The technical SEO audit is an important part of a website’s SEO strategy and should be one of the first things that you look into to improve your visibility in the Google search results.
Why Are Technical SEO Audits Important?
Technical SEO Audits are important because even if you’ve spent a long time creating excellent content, your users may not even see it if there are issues with your website’s crawlability and indexability.
However, even if your site can be found by internet users, its rankings could be hurt by performance-related technical factors. Page load time is a ranking factor, which means that a slow website is unlikely to reach top spots in SERPs (search engine results page).
Internet users are even less patient than Google crawlers and will leave your website if it takes ages to load.
Likewise, a poorly structured website can also lead to confusion among your users. A site that is easy to navigate leads to a better user experience, and consequently, generates more leads.
During a technical search engine optimization audit, you could also find out that mobile users face numerous problems while browsing your website. Given the fact that mobile devices generate more than half of worldwide web traffic, such issues could lead to a terrible loss of revenue. Let’s also not forget that mobile-friendliness is a ranking factor.
Technical SEO Audit Checklist
Here’s what tools we recommend in order to complete your Technical site Audit:
 Screaming Frog – use this SEO audit tool to crawl your website and quickly identify technical SEO problems.
- Google Analytics & Google Search Console – to identify technical SEO issues related to crawl errors, performance etc.
- The Technical SEO Audit Template – this free technical SEO audit checklist summarizes each of the points that we cover in this guide.
Crawlability & Indexability

As we’ve already mentioned, making sure that your site content can be crawled and indexed is a critical aspect of technical SEO.
If they can’t find it, then it doesn’t exist in their eyes.
In this section of our technical SEO audit guide, we’ll walk you through the various in which you can audit your website for technical SEO issues related to crawling and indexing.
Robots.txt
What is the Robots.txt file and Why Is It Important?
A robots.txt file is a file that instructs search engine crawlers which pages or files they can and can’t access on your website.
For example, if you have an eCommerce site , then you don’t want search engines to access sensitive pages like the cart or checkout page.
It’s worth noting that…
(or other search engines).
Why? Because your web page may still be indexed by Google if other sites have linked to it with descriptive text.
Robots.txt Audit Checklist
- Ensure that the file is stored within the root directory of your domain.
- Access your file by going to: com/robots.txt.
Here’s what ours looks like: https://thesearchinitiative.com/robots.txt

And here’s the robots.txt for: https://searchengineland.com/robots.txt

- Use the User-agent parameter to specify which search engine bot you’re creating the rules for.
Below are examples of search engines and their respective user-agents (i.e. what the search engine identifies as):
 Google: Googlebot
- Google Images: Googlebot-Image
- Bing: Bingbot
- Yahoo: Slurp
- Baidu: Baiduspider
- Yandex: YandexBot
Helpful tip: use the asterisk (*) wildcard. This is a special character that allows you to assign rules to all user-agents.
- Use the Disallow directive (i.e. a rule you want the user-agents to follow) to restrict a page or directory from being accessed by a bot.
# this directive blocks all crawlers
User-agent: *
Disallow: /
- Use the Allow directive to grant search engines access to a page or directory.
# this directive grants access to all crawlers
User-agent: *
Allow: /
- * – Use this to apply your directives to all user-agents, as well as to match URL patterns (i.e. groups of similar URLs).
Below are some examples of wildcards you can use:
For example, the below set of rules prevents all user agents from accessing URLs in the /product/ subfolder that may contain a question mark.
# this directive grants access to all crawlers
User-agent: *
Disallow: /products/*?
- $ – Use this to indicate the end of a URL
# this directive grants access to all crawlers
# This directive blocks all user-agents from accessing PDF files.
User-agent: *
Disallow: /*.pdf$
- # – Use this to add comments and make your file more readable and human-friendly
- Ensure that each directive (i.e. rule) is on a new line.
- Ensure that your file uses each user-agent only once to avoid confusion.
For example, if your robots.txt had the following set of rules:
User-agent: Googlebot
Disallow: /subfolder-a/

User-agent: Googlebot
Disallow: /subfolder-b/
Google would still follow both directives.
But, it could quickly get pretty confusing if your robots.txt has many rules. Therefore, something like the following is much better and cleaner:
User-agent: Googlebot
Disallow: /subfolder-a/
Disallow: /subfolder-b/
- If your website has multiple subdomains, use a separate robots.txt file for each one.
- Once you have added your directives, test your robots.txt using Google’s own tester via Google Search Console.
XML Sitemaps
What is an XML Sitemap?
An XML sitemap (or sitemap) is an XML (Extensible Markup Language) file used to tell search engines where to find the most important content on websites.
XML Sitemap Audit Checklist
Below, we’ve outlined some simple checks that you should follow when auditing your XML sitemap as part of your technical site audit.
- Your sitemap should include any page or file that you want search engines to crawl and index on your website.
- Your sitemap’s file size does not exceed 50MB.
- Your sitemap should not contain more than 50,000 URLs.
- If your website has video content, you should create a separate Video Sitemap.

- If your website publishes news articles on a regular basis, you should create a separate Google News Sitemap.

- For any images you want Google (or other search engines to crawl), you should create a separate Image Sitemap.

- Only pages that are indexable should be added to your sitemap.
- Ensure that you add a reference to your sitemap in your robots.txt.
Here’s an example of how this might look like:

- To make it as easy as possible for search engines to find your sitemap, stick to the default naming convention: com/sitemap.xml
- Remember to submit your XML sitemap(s) to Google Search Console > Sitemaps > paste in the site URL of your sitemap (i.e. “sitemap.xml”) > Submit
If you want a full list of possible on-page optimizations, I’ve put together a guide on how to audit the On-Page elements of your web pages.

Here’s the XML sitemap for The Search Initiative: https://thesearchinitiative.com/sitemap.xml

If you do not currently have a sitemap, you can create one manually or by using a tool like this XML Sitemap Generator from Screaming Frog.
If your website is on WordPress, your life is about to get much easier as there are many SEO plugins such as Google XML Sitemaps and Yoast that will automatically generate your sitemap(s) for you.
Index Bloating
A very common technical SEO issue that most websites tend to face, is index bloating.

Sometimes, Googlebot (Google’s web crawler) will crawl and index pages that simply offer no value to the end-user. These pages “bloat” your index and use up precious crawl budget as Google spends time unnecessarily crawling and indexing them.
Below are some simple checks you can make in order to identify the types of pages that cause index bloating.
Once you’ve carried out these checks, follow this awesome guide from Ahrefs on how to go about removing them from Google’s index.
Pagination
Paginated pages being indexed by Google can cause serious duplicate content issues. This is a common problem for eCommerce websites that may have thousands of products and hundreds of categories.
To quickly check whether your paginated pages being indexed, use the following site searches:
- site:yourdomain.com inurl:page – this returns all pages indexed that contain “page” in the URL.
- site:yourdomain.com inurl:p= – this returns all pages indexed that contain “p=” in the URL.
In the below example, we can see that the Zara website has over 14,000 paginated pages that have been indexed.

Tags
Adding tags to your WordPress or eCommerce sites is useful in organizing the content on your website, but it can also create SEO issues such as duplicate content.
To quickly check whether you have any tagged pages indexed in the SERPs (search engine results page), use the following site searches:
- site:yourdomain.com inurl:tag – this returns all indexed URLs that contain “tag”
- site:yourdomain.com inurl:/tag/ – this returns all indexed URLs that contain “/tag/”

Don’t believe this is important? Here are the before-and-after results of a client we had in the eCommerce space where one of the things we did was remove /tag/ pages from the index.

Check out the full case study here.
HTTP Pages
If your website isn’t on HTTPS (you really should move over to HTTPS!), then it’s a given that all of your HTTP pages will be indexed. However, if you’ve made the move to HTTPS, there’s still a chance that some of the HTTP versions of your pages are indexed.
To check this, use the following site searches:
- site:yourdomain.com inurl:https:// – this returns URLs that contain “https://” in the URL
- site:yourdomain.com -inurl:https:// – this returns URLs that do not contain “https://” in the URL
We can see below, that the Zara website also currently has over 2k HTTP pages indexed by Google – these are unnecessarily wasting crawl budget and creating duplicate content issues.

Serving Both www. and non-www. Pages
If your website serves pages with www., then it’s important that there aren’t any non-www. pages being indexed by Google as this causes further duplication.
To check this, use the following site searches:
- site:yourdomain.com inurl:www. – this returns URLs that contain “www./” in the URL
- site:yourdomain.com -inurl:www. – this returns URLs that do not contain “www.” in the URL
If we look at the River Island website, we can see that by default, it serves www. pages: https://www.riverisland.com/. However, there are still almost 56k pages without www. indexed by Google.

Having this many duplicate pages can be incredibly problematic and impact a website’s performance in the search engine rankings.
eCommerce Empty Category Pages
As a customer, one of the worst feelings is landing on a page to find that the website whose page you clicked doesn’t actually sell the product you’re looking for but still has a page for that category of products. This isn’t just an experience issue, but an indexing issue too.
To spot empty categories that may be indexed, use the following site search:
- site:yourdomain.com “0 products found” – this returns all pages that contain the text “0 products found”
Or, for even quicker results, run your website through a crawling tool like Screaming Frog and filter your category pages by word count.
The River Island website currently has over 15k pages that contain “0 products found”.

Not only could having this many empty category pages result in a thin content penalty from Google (which you really don’t want), it also spoils the user’s experience as the page doesn’t provide them with what they’re looking for.
eCommerce Sorting & Views
eCommerce websites allow you to sort and filter products in a number of ways – from sizes and colors to price and popularity. This is great for user experience as it means that your customers can easily find what they are looking for.
But from an SEO perspective, this can cause technical issues as these pages are identical to the original page that the user landed on, the only difference is the order of the products.
Identify pages containing these kinds of variants in the index via the following site searches:
- site:yourdomain.com inurl:price – this returns URLs that contain “price” in the URL
- site:yourdomain.com inurl:size – this returns URLs that contain “size” in the URL
- site:yourdomain.com inurl:color – this returns URLs that contain “color” in the URL
- site:yourdomain.com inurl:brand – this returns URLs that contain “brand” in the URL
Below, we can see examples of these automatically generated (and indexed) URLs on the River Island website.
https://www.riverisland.com/c/women/holiday-shop?f-design=stripe&sort=price-lo-hi

At this point, I’d like to say “Thanks for being a good sport, River Island.” 🙂
Others
Here’s a list of other possible cases of index bloat that you should look out for a while completing your technical search engine optimization audit:
- Pages with and without trailing slashes
- Having various pages that serve the same content i.e. example.com/index/, example.com/index.html, example.com
- Pages with and without capital letters i.e. example.com/cart/ and example.com/Cart/
- Pages for different device types i.e. example.com/seo/ (desktop), m.example.com/seo/ (mobile)
- Pages with AMP and non-AMP i.e. example.com/seo/ (non-AMP) and amp.example.com/seo/ (AMP)
As we’ve seen, each of these types of pages cause duplicate content problems which can hinder your website’s SEO performance.
Meta Robots Tag
What is the Meta Robots Tag & Why Is It Important?
The meta robots tag (or meta tag) is one method that allows you to specify how you want web crawlers to crawl the web pages on your website.

This is because all pages on the Internet will be crawled and indexed by search engine bots unless told otherwise. In other words, they are set by default to “index,follow”.
For example, you can use meta robots directives to prevent bots from crawling pages that may be in your development/staging environment or those that may contain thin/duplicate content.
Meta Robots Tag Audit Checklist
- Ensure that the meta robots tag is placed into the <head> section of your web page.
- Use <meta name=”robots” content=”noindex”> for pages that you don’t want any search engine to index.
- Use <meta name=”googlebot” content=”noindex”> for pages that you don’t want Googlebot to index.
- Ensure that your parameters do not conflict with each other, Google will use the most restrictive parameter by default. For example <meta name=”googlebot” content=”noindex, index”>.
- If you are wondering why a page isn’t indexed, check to see whether the meta robots tag has been set with the “noindex”
X-Robots Tag
What is the X-Robots Tag & Why Is It Important?
The X-Robots tag is an element of the HTTP header that controls the indexing of web pages as well as specific elements of a page. Using this method is great if you want to prevent Google (and other search engines) from indexing resources that aren’t HTML pages like images of PDF files.
Here’s an example of what an X-Robots tag would look like:

X-Robots Tag Audit Checklist
Here are a few tips you can use when implementing the X-Robots tag on your website:
- Make sure you have access to your website’s php, .htaccess, or server access file.
- You can use the same directives as you would for the Meta Robots Tag i.e. noindex, nofollow, index, follow etc.
- To block specific pages, add the following syntax to the HTTP header of that page:
Header(“X-Robots-Tag: noindex”, true);
Here’s an example of what it can look like:

- To block file types, (i.e. .doc or .pdf pages) from being indexed without having to list all of them in your robots.txt file, use the following syntax in your .htaccess (or httpd.conf file).
<FilesMatch “.(doc|pdf)$”>
Header set X-Robots-Tag “noindex, noarchive, nosnippet”
</FilesMatch>
Canonical Tag
What is a Canonical Tag & Why Is It Important?
The canonical tag is a way of specifying which version of any duplicate pages you want search engines to treat as the master copy and index. The tag was created by Google, Yahoo, and Microsoft in 2009 to allow webmasters to solve duplicate content issues.

For example, if we had the following two pages with the same content:
https://yourdomain.com/master-page/
https://yourdomain.com/secondary-page/
Then, we would add the following code to the /secondary-page/:
<link rel=“canonical” href=“https://yourdomain.com/master-page/” />This tells Google that we want to treat the URL https://yourdomain.com/master-page/ as the master (canonical) page.
Canonical Tag Checklist
Here’s a quick checklist you should follow when implementing canonicals on your website:
- According to Google’s John Mueller, you should use absolute URLs instead of relative paths.

This means that you should use:
<link rel=“canonical” href=“https://example.com/master-page/” />Instead of just:
<link rel=“canonical” href=”/master-page/” />- Use lowercase URLs instead of capitalized URLs as Google may treat these differently
This means that you should use:
<link rel=“canonical” href=“https://example.com/master-page/” />Instead of:
<link rel=“canonical” href=”https://example.com/Master-page/” />- Use the correct version of your domain – ie. HTTPS or HTTP.
If your website has switched over to HTTPS, then you should ensure that your target URLs don’t include any HTTP pages.
This means that you should use:
<link rel=“canonical” href=“https://example.com/master-page/” />Instead of:
<link rel=“canonical” href=”https://example.com/Master-page/” />- Canonicalize your homepage – We’ve already seen how your homepage can be duplicated in various ways (i.e. example.com, example.com/index, example.com/index.html etc) so it’s good practice to canonicalize your home page proactively.
- Don’t use multiple canonicals – If Google encounters more than one rel=canonical on a page, it will ignore them all.
- rel=canonical should appear in the <head> or HTTP header – Google recommends that you Include the rel=canonical link in either the <head> of the page or the HTTP header.
- Self-referential tags are recommended – Although they are not essential, Google’s John Mueller recommends using self-referential canonicals “because it really makes it clear to us which page you want to have indexed, or what the URL should be when it is indexed”.
A self-referential canonical tag is basically adding a canonical tag to a page that points to itself.
For example, if we wanted to add one to https://example.com/master-page, then we would add the following to its <head> section (or HTTP header):
Instead of:
<link rel=“canonical” href=“https://example.com/master-page” />- Canonicalized (master) pages shouldn’t be blocked – A common mistake, but one that is worth mentioning because the last thing you want is to find out that you’ve actually disallowed Google from accessing your canonicalized pages (i.e. your master pages) in your robots.txt or have added a “noindex” meta tag.
- Non-canonicalized pages shouldn’t appear in your sitemap – Google recommends that only your canonicalized pages are listed in your sitemap.
When carrying out an audit of the canonical tags on your website, ask yourself the following questions:
- Is the canonical tag in the <head> section of the code (or the HTTP Header)?
- Is the canonical tag pointing to the correct URL?
- Is the canonicalized URL blocked from being indexed in any way?
If the answers to these questions are, yes, yes and no, then you’re all good!
HTTP Status Codes
When conducting your technical SEO audits, it’s important to look at the HTTP status codes that your pages return.
HTTP status codes are essentially part of the “handshake” that occurs between servers and browsers to determine the status of a web page.
Although there are many HTTP status codes out there, there are 5 main types that are important to SEO.

We’ll focus on the two most important classifications of HTTP status codes that can be problematic for your SEO: redirects (301 and 302) and client errors (specifically 404).
To quickly audit the HTTP status codes that your web pages return, use the SEO Spider tool from Screaming Frog.
301 Moved Permanently

A 301 response code is returned by the server when a URL that the user has requested has been permanently moved to a new location.
The way you implement and handle these kinds of redirects is incredibly important in ensuring that you don’t lose any of your precious search engine rankings.
If your website runs on Apache web servers, the most common way to implement a 301 redirect, is via your website’s .htaccess file which is usually located in your site’s root directory. If your site runs on Nginx, read this and if it runs on Windows/IIS then follow this guide.
For Apache users, add the following line of code to your .htaccess file if you want to…
- Redirect a single page:
Redirect 301 /old-page.html /new-page.html- Redirect to an entire new domain:
Redirect 301 / https://www.new-domain.com/- Redirect your entire site to a new subfolder:
Redirect 301 / https://www.your-domain.com/subfolder/- Redirect from non-www to www:
RewriteEngine on
RewriteBase /
rewritecond %{http_host} ^your-domain.com [nc]
rewriterule ^(.*)$ https://www.your-domain.com/$1 [r=301,nc]- Redirect your entire domain from HTTP to HTTPs
RewriteEngine On
RewriteCond %{HTTPS} off
RewriteRule ^(.*)$ https://%{HTTP_HOST}%{REQUEST_URI} [L,R=301]
You can find a more comprehensive guide on implementing 301 redirects here.
If your site runs on WordPress, there are a bunch of super useful plugins like the free Redirection plugin that eliminates the need for you to edit the .htaccess file entirely.

In case you didn’t know, 301 redirects are great because they pass on the majority of the original URL’s ranking power to the new URL.
You should use a 301 redirect:
- If you are changing the URL of a page or subfolder – For example, changing example.com/seo-checklist/ to example.com/seo-audit-checklist/
- If you are changing from a subdomain to a subfolder – For example, changing usa.example.com/ to example.com/usa/
- If you are moving your entire website to a new domain – For example, changing yourdomain.com to yournewdomain.com
- If you are switching from HTTP to HTTPS – For example, changing https://example.com to https://example.com
- If you are switching from www. to non-www. (and vice versa) – For example, changing https://example.com to https://www.example.com
- If you absolutely must – Once you’ve implemented a 301 redirect, there’s no going back. This is because it can take a while for Google to recrawl and index the original URL, but importantly, you’ll lose the ranking authority of that URL if you later decide to remove the 301 redirect.
When auditing 301 redirects, you should look out for:
- 404 pages that redirect to the homepage – Google’s John Mueller stated that pages that redirect all its 404s to the homepage are treated as “soft 404s”, which we’ll explore very soon! This is not great practice because it “confuses users”.

- Redirect chains – Google says that “While Googlebot and browsers can follow a “chain” of multiple redirects (e.g., Page 1 > Page 2 > Page 3), we advise redirecting to the final destination. If this is not possible, keep the number of redirects in the chain low, ideally no more than 3 and fewer than 5.”
Use this HTTP status checker to identify redirect chains.
To fix a redirect chain:
- Remove the redirects from the middle pages and implement a 301 redirect from the old URL to the destination URL.
- Replace any links pointing to the old URL with the new destination URL.
- Infinite redirect chains – an infinite redirect chain would look something like this: Page 1 > Page 2 > Page 3 > Page 1 i.e. the destination page is the same as the starting page.

To fix an infinite redirect chain:
- If the URL is not supposed to be redirected at all, then change the HTTP response code to 200.
- If the URL should be redirected, then fix the final redirect so that the loop is broken and the destination URL does not point to the original URL.
- Broken 301 redirects – A 301 redirect that points to a page that doesn’t exist or returns a server error isn’t great for user experience. It’s also a waste of that page’s ranking power because you’re passing this authority to a page that is essentially dead.
To fix broken redirects:
- Replace the broken URL with a more appropriate URL.
- HTTP pages that don’t redirect to HTTPS – Type in “https://yourdomain.com”. If your page isn’t redirected to “https://yourdomain.com”, then you should implement a 301 redirect from the HTTP to the HTTPS version.
302 Found / Moved Temporarily

A 302 redirect indicates that the URL exists (i.e. it’s been found by the server), but that it has been temporarily moved to a new URL.
For example, you may want to use a 302 redirect if you’re temporarily updating a sales page on your product.
When auditing the 302 redirects on your website:
- Ensure that they haven’t been left for a long time – Search engines will start to treat them as permanent redirects.
- Ensure that they are implemented for temporary redirects only – You should be using a 302 redirect if and only if you want to temporarily redirect a URL to a different location. This is because 302 redirects essentially tell the search engines that you’ll eventually revert back to the original URL. It’s also worth noting, that unlike 301 redirects, 302 redirects do not pass any ranking power.
404 Not Found

The 404 Not Found code is perhaps the most common (and arguably most frustrating) of status codes that users will have encountered. They essentially tell the user that the resource they’re trying to access cannot be found by the server and likely no longer exists.
Needless to say, 404 errors are detrimental to the user’s experience of your website.
When auditing your website for 404 errors:
- Ensure that they return a custom 404 page – Google recommends creating customized 404 pages that “can be branded with your website and include helpful information” rather than relying on standard 404 pages that are generated by the server.
This page should:
- Clearly inform users that the page they’re looking for can’t be found.
- Looks and feels the same as the rest of the pages on your website.
- Contains links to similar or other popular pages that the user may find interesting.
- Contains a link to your homepage.
- Implement a redirect for pages that have moved – If the URL has changed, you should implement a 301 redirect to let both your users and search engines know.
The quickest way to find 404 errors is to crawl your website using a tool like Screaming Frog.
Soft 404s
A Soft 404 error is where a page that no longer exists (because it may have been deleted) displays a “page not found” message to the user but doesn’t actually return an HTTP 404 status code.
In other words, they tell the user that the page doesn’t exist, but tell search engines, that the page does exist.

This should be avoided as it essentially tells search engines that the page is legitimate and as a result will not lead to that page being indexed. In addition, this also leads to unnecessary crawling and recrawling of the page.
An example of a Soft 404 page could be empty tag pages that display no content.
Here’s how to combat Soft 404s:
- If the page no longer exists – It should return a 404 (not found) or 410 (gone) response so that browsers and search engines are notified about it’s nonexistence.
- If the page has moved – You should return a 301 redirect so that the user is directed to the most relevant page.
Crawl Errors
What are Crawl Errors?
Crawl errors refer to problems that Googlebot encountered while trying to crawl the content on your website.
You can access your crawl errors via Google Search Console > Coverage

Crawl errors are divided into two groups:
- Site errors – This means that Google was unable to crawl your entire site, you definitely don’t want these.
- URL errors – This means that Google was unable to crawl specific URLs on your website.
Each page on your site will have one of the following four statuses:
- Error – The page is not indexed due to a technical error.
- Warning – The page is indexed, but has an issue with it (i.e. it is blocked by your robots.txt file)
- Excluded – The page is (intentionally) not indexed.
- Valid – The page is indexed, with no issues.
Why are Crawl Errors Important?
The answer to this one’s quite simple.
If Google (and other search engines for that matter) can’t crawl your content, it won’t rank.
Looking at the Index Coverage report on Google Search Console to see if your content has been crawled, is a vital step when you perform a technical SEO audit.
Crawl Errors Audit Checklist
- Server error (5xx) – Your server returned a 500-level error.
- Redirect error – Google may have identified a “redirect chain that was too long; a redirect loop; a redirect URL that eventually exceeded the max URL length; there was a bad or empty URL in the redirect chain”.
- Submitted URL blocked by robots.txt – The page has been submitted for indexing (in your Sitemap), but is blocked in your robots.txt.
- Submitted URL marked ‘noindex’ – The page has been submitted for indexing (in your Sitemap) but is blocked by a noindex tag.
- Submitted URL seems to be a Soft 404 – The page has been submitted for indexing, but Google has identified it as a soft 404.
- Submitted URL returns unauthorized request (401) – The page has been submitted for indexing, but Google is unauthorized to access it as a result of a 401 response code.
- Submitted URL not found (404) – The page that has been submitted for indexing does not exist.
- Submitted URL returned 403 – The page that has been submitted for indexing requires authorized access, which Google does not have.
- Submitted URL blocked due to another 4xx issue – the page that has been submitted for indexing returned a 4xx response code other than the ones specified above.
You can find out more on how to fix each of these issues from the Index Coverage report on Google Search Console here.
Site Speed Optimization
Apart from identifying crawlability and indexing problems, a thorough technical search engine optimization audit should also highlight performance issues.
What is Site Speed?
According to Google, site speed “reflects how quickly a website responds to web requests”.

Google measures your website’s load times by looking at “the speed of all the pages that make up your site based on real-world data”.
This data is collected via the Chrome User Experience Report (CrUX) which is updated on a monthly basis.
Why is Site Speed Important?
Google has explicitly confirmed site speed as an SEO ranking factor in 2010 – that alone should be reason enough.
This means that websites that are slow to load will lose out on rankings, search traffic, conversions, and operational costs.
For users, a slow loading website means a poor experience – which will result in a high bounce rate (how quickly users leave your site).
Need some proof?

The above is taken from a Google study that shows how bounce rates increase in correlation with slow loading times.
Still don’t believe us?
Here’s a case study showing how we improved our eCommerce client’s page load times helped achieve 93.20% more transactions and almost 40% more revenue.

Therefore, looking at how fast your site loads is undoubtedly one of the most important technical SEO factors when conducting an SEO audit.
What is Page Speed?
Page speed is the time taken for an individual page to load.
This is determined and measured by a number of metrics that encapsulate various different stages of the load time.
For example, the First Input Delay (FID) metric looks at the time taken for a web page to respond to a user interaction (i.e. clicking on a link), whereas First Meaningful Paint (FMP) measures the time taken for enough content to load so that the user/search engine can read it.
Why is Page Speed Important?
Simply put, page speed is important because it’s also an SEO ranking factor.
Regardless of whether or not your overall website loads fast, if a specific web page is slow, it will struggle to rank against its faster competitors for its keywords.
Why? Because Google’s goal is to provide its users with the best possible experience for each query, which means it will prioritise faster loading pages over slower loading pages in the organic search results.
As a result, making sure the web pages on your site are quick to load for your target audience should be a priority.
Site & Page Speed Optimization Audit Checklist
To make your technical SEO audit process as easy as possible, we’ve put together a checklist that you can use to optimize your website’s site and page speeds.
Measuring Site & Page Speed
Let’s take a look at how you can measure your website’s performance using Google Analytics and other third party tools.
Site Speed
To measure your website’s loading times, head over to Google Analytics and navigate to: Behaviour > Site Speed > Overview

Here, you’ll find the average loading times for your site based on various metrics as well as how these speeds vary based on the browser and location of your visitors.
To view a breakdown of the times on a page level, navigate to: Behaviour > Site Speed > Page Timings

This will allow you to identify pages that (on average) had slower load times for users over a given period.
For example, pages that take longer than four seconds are considered slow.
Page Speed
Some great SEO tools for measuring page speed are GTMetrix and Pingdom.
Google’s own tool called PageSpeed Insights is probably one of the best SEO audit tools for measuring performance on both desktop and mobile.
All you have to do is enter your web page’s URL and click “ANALYZE”.

The boohooMAN website above clearly needs some improvements!
Each page is given a Performance Score out of 100 based on various metrics from field data (real-world users) and lab data (theoretical scores based on Google’s own testing).
You can find out more about what kinds of speeds you need to aim for in order to achieve a “Good”, “Needs Improvement” and “Poor” rating here.
The report also conveniently lists opportunities to help improve your page’s technical performance.

Fixing Site & Page Speed
Now, let’s take a look at the key steps you can take to maximize your SEO efforts by improving your site’s load times.
- Minimize server response times – Unsurprisingly, a computer in the US will load a page quicker from a Canadian server than one based in Asia for example.
Using a CDN (content delivery network) like Cloudflare helps you serve content from various different geographical locations which in turn, improves your site speed.
- Minimize the number of requests made to the server – Web servers can only handle a certain number of requests at a time before they start to slow down or crash entirely. In order to reduce the number of requests to your servers you can:
- Merge JavaScript and CSS files into a single file where appropriate.
- Minimize the number of plugins that generate and use external JS and CSS files.
- Sprites should be used for images that appear on your site frequently i.e. your business logo.
- Minimize the number of 301 redirects – every time a user is redirected, that counts as another request to the server which has to first try to fetch the original URL and then the new URL.
- Browser Caching – Storing resources locally (i.e. on your users’ browsers) improves performance especially when it comes to reloading. This is because the browser doesn’t need to retrieve those resources again from the server. Learn more about browser caching here.

- Remove unused JavaScript & CSS files – Google recommends removing unused JS files and unused rules from stylesheets to minimize the consumption of bytes by network activity.
- Remove render-blocking JavaScript & CSS – These are resources that are delaying the First Content Paint of your page. Google recommends inlining scripts to avoid these additional network requests.
- Compress and minify JS and CSS – Some JS files and stylesheets can have 100s if not 1000s of lines of code. You should try to compress and minify these resources by:
- Using shorter names for your functions
- Removing comments
- Minimizing the amount of spacing
- Removing redundant code or functions that may not be used
Here are some tools you can use to minify HTML, JS and CSS.
- Optimize your images – there are several ways to optimize your images so that they load quicker.
- Use appropriate image sizes across your web pages for the right screens – this is because loading a high-resolution image and then scaling it down is a waste of resources and time.
- Compress your images using lossy (if image quality is not of importance) or lossless (if image quality is of importance) compression. Tools like TinyPNG or WordPress plugins like WP Rocket are great!
Lazy-load your images so that you only load them as and when they are needed. This is because some users may not even reach the bottom of your page, but you still loaded all of the resources. Learn more about lazy loading here.

We hope the steps outlined above make your technical search engine optimization audit a bit easier. If you need more information on how to go about optimizing your website’s speed, check out this brilliant article from Moz outlining more of the best practices.
Advanced Technical SEO
If you want to take your technical SEO audit even further, you should consider reviewing the following technical elements.
In this section, we’ll show you how to audit technical SEO factors like structured data, mobile SEO, server log file analysis, HTTPS and JavaScript SEO.
Each of these SEO elements are crucial for ensuring that your site’s technical SEO is at its best.
Structured Data & Schema Markup
Structured data is probably one of the more complex components of a Technical SEO site audit.
Although having some knowledge of coding is useful, it’s not essential in learning how to add structured data to your website because there are lots of great tools available that help simplify the process.
But, you definitely need to know what structured data is and why it’s important to focus on it when you carry out your next SEO site audit.

What is Structured Data?
Structured Data (or schema markup) helps search engines to understand what your web pages are about.
The methodology was put together by the major search engines (Google, Bing, Yandex, Yahoo!) to allow webmasters to do this using a “structured” format via JSON-LD (JavaScript Object Notation for Linked Data).
For example, if you have a page for a Salted Caramel Ice Cream recipe, humans can easily identify important information such as the ingredients, cooking time(s) and nutritional value, etc.
However, search engines need a little hand.
A nice analogy we like to use is to think about structured data as being the content that you’re writing for search engines.
Why is Structured Data Important?
Structured data is worth including in your technical SEO audit because it has a big impact on how your web pages appear in the search results pages.
Below is an example of a web page with structured data that is ranking for “salted caramel ice cream recipe”:

And here’s one without structured data:

If you’re still not convinced, SearchEngineLand found that marking up your content can increase your CTR (click-through rate) by up to 30% and in turn, yield more organic traffic to your web pages.
This is one of many reasons why looking at structured data should be a vital component of your technical SEO audits.
Structured Data Audit Checklist
To make things as easy as possible for you, here’s a checklist you can use for your schema markup audit:
- Pick the right schema markup for your page – There’s a schema markup for pretty much anything, so it’s important that you mark up the content on your site using the right schemas. You can find the full hierarchy of schema markups here.
But here’s a list of the most common types that you’ll likely need:
- Use Google’s Structured Data Markup Helper tool – This tool quickly and easily allows you to generate the structured data code for your web page.
All you have to do is:
- Enter the URL of the page you’re marking up
- Select the data type
- Hit “Start Tagging”

- Place your structured data in the <head> section of your web page.
- Test the structured data using Google’s Rich Results Test – This will tell you if your structured data has any errors.

All you have to do is:
- Enter the URL of the page you’re testing.
- Select whether you want to test via the mobile or desktop version of Googlebot.
- Hit “TEST URL”
- Follow Google’s instructions on how to fix any issues that it may have encountered. But if all goes to plan, your display will look like this.

- Use JSON-LD instead of RDFa or Microdata – This won’t be a problem if you’re using the above recommended tools, but in the case that you’re implementing your structured data using raw code, Google specifically recommends using JSON-LD instead of RDFA or Microdata.
- Ensure that your structured data adheres to Google’s official guidelines – For example:
- Don’t mark up content that isn’t visible to the user.
- Don’t mark up content that’s irrelevant or misleading.
- Ensure that the content you markup is relevant and up to date.
- Add the same markup to all versions of a web page and not just the canonical version.
Mobile SEO
Another massive component of a technical SEO audit is Mobile SEO.
What is Mobile SEO?
Mobile SEO is the art of optimizing your site to make it as friendly as possible for smartphone and tablet users.
For search engines, it’s about ensuring that your resources are easily accessible for its crawlers.

Why is Mobile SEO Important?
Mobile SEO is important because as of 2016, the majority of Google searches are now made via a mobile device.
Poorly optimized mobile sites result in an equally poor experience for the user. For instance, if your mobile site is slow to load or users have to pinch/zoom-in to access content, they’ll likely leave your site and check out your competitors instead.
Here’s an interesting mobile SEO fact….
Google found that 77% of mobile searches occur at home or at work. So even where desktop computers are likely to be present, users are opting to search on mobile devices.
Therefore, having a mobile-friendly site for your target audience is more important than ever before in SEO.
This (unsurprising) shift in search behavior led to Google changing the way it approaches its crawling and indexing.
In 2018, the search engine rolled out mobile-first indexing, which means that Google now uses the mobile version of your site to determine the search ranking for both desktop and mobile searches.
This is why mobile SEO is one of the most important elements of a technical SEO audit.
The good news is that there are lots of SEO audit tools and reports on Google Search Console that you can utilize to help make the auditing process much easier.
Mobile SEO Audit Checklist
We’ve put together this Mobile SEO audit checklist outlining some of the best practices and common pitfalls that you should avoid.
- Check if your web pages are mobile-friendly – The best way to check whether your web pages are optimized for mobile is to use Google’s Mobile-Friendly Test

Once you’ve run the test, you’ll see a report like this.

The report provides a quick overview of whether or not your web page passed Google’s test.
- Check for mobile usability issues on Google Search Console – You can also find SEO issues via the Mobile Usability report on Google Search Console.

The report will list all of the pages that aren’t considered by Google as being mobile-friendly along with suggestions on how to fix them.
- Do your mobile pages load quickly? – You should implement best practices for improving your load speeds on mobile.
One quick and simple way to do this is to optimize your images by using image compression, scaling, and lazy-loading.
- Are you using responsive web design? – Google recommends using responsive web design (RWD) so that your pages automatically adapt to the user’s screen size.
Your should use RWD because:
- It improves user experience
- Reduces bounce rate
- You only need one URL per page which makes it easier for users to link to you
- Improves conversions
- It’s easy to implement and maintain
- It’s easy for search engines to detect

Add a meta viewport tag to the head of your web pages to let the user’s web browser know that you’re using RWD.
<meta name="viewport" content="width=device-width, initial-scale=1.0">Here’s a great SEO tool that lets you see how your site responds to various screen sizes.
- Is your site optimized for mobile-first indexing? – In order to make it easier for your site to be indexed by search engines, you should:
- Ensure that Googlebot is able to render your content – you can do this via the Mobile-friendly Test tool linked above.
- Make sure that both the desktop and mobile versions of your site are the same.
- Ensure that structured data is implemented correctly on both the desktop and mobile versions of your site.
- Use the same page titles, headings, and meta data for both mobile and desktop.
To find out more about the best practices for mobile-first indexing, check out this article from Google.
- Avoid cross-linking – This is where some of the internal links on your desktop pages point to the mobile version and vice versa. You should ensure that your internal links point to the most relevant pages.
- Have you implemented redirects correctly? – Ensure that mobile users who land on a desktop URL aren’t redirected to the homepage, but instead, are taken to the most relevant page as this will provide a better experience.
- Avoid Interstitials and Popups – Let’s face it, everyone hates popups. Including Google, who rolled out an update penalizing sites with “intrusive” popups because they disrupt the user’s experience drastically. This also includes interstitials and banners that are too large and impede the main flow of the page.
Here are some examples of popups that Google deems acceptable.

And some that should be avoided:

So if you want to avoid any penalties from Google and create a better search experience for your target audience, ensure that the above guidelines are followed.
- Don’t block resources for mobile users – Your mobile users should be able to see exactly what desktop viewers see. Google doesn’t like seeing sites blocking content or resources such as JS/CSS files from mobile users. This wasn’t as much of an issue before. But remember, now that Google uses the mobile version of your site for indexing, you can’t afford to block any resources.
Following the above points when carrying out your SEO audit for mobile will undoubtedly help improve your site’s ranking ability.
Whether it’s the mobile usability reports on Google Search Console or the Mobile-Friendly Test tool, don’t forget to make the most of the SEO tools available to you. They’ll make your technical search engine optimization audit a breeze!
Server Log File Analysis
Now we’re really getting technical!
If you really want to take your technical SEO audit to the next level, you’re going to want to read this next section on server log file analysis.
What is a Server Log File?
A server log file is a file that automatically records information about every HTTP request made to your web server.

This includes information such as the IP address of the client, the timestamp, the type of HTTP request, the requested URL, the HTTP status code of the URL that the server returned as well as the user agent (i.e. web crawlers).
Why Should You Analyze Your Server Log File?
An often overlooked part of a technical SEO audit, log file analysis is vital to providing insights into the technical aspects of your site.
Here are the benefits of analyzing your server log file for SEO:
- Identify crawlability and accessibility issues – Your log file will allow you to identify which resources can and cannot be crawled by web spiders, thanks to the HTTP status code responses.
- Provide an insight into your crawl budget – The file will show you which bots are crawling your site and importantly, how often it’s being crawled.
- Identify orphan pages – These are pages that have no internal links pointing towards them and as a result, cannot be crawled by search engines.
- Identify crawl frequency of pages – Your log file allows you to see which pages are being prioritized by bots as well as those that perhaps should be crawled more often, but aren’t.
- Highlight pages that should not be crawled – On the flip side, you can spot any pages or directories that are being crawled by web spiders but shouldn’t be for whatever reason.
As we can see, your server log file provides lots of useful information about how your site is being crawled, allowing you to understand and make the most of your crawl budget.
Server Log File Audit Checklist
Now that you know why server log file analysis is beneficial to your SEO efforts, let’s look at how you can make it part of your technical search engine optimization audit.
To download and access your log files, use the following:
- Apache log files (Linux)
- NGINX log files (Linux)
- IIS log files (Windows)
Or, you can download the file manually from your cPanel where it’ll be listed under Raw Access.
To audit your log files, we recommend either using the Log File Analyzer tool from Screaming Frog or JetOctopus’s log analyzer.
Both of these SEO tools are brilliant, but for the scope of this checklist, we’ll be using Screaming Frog.
Here’re the checks you should make once you’ve run the log file audit:
- View URL Crawl Frequency – To check the crawl frequency of your URLs, navigate to the URL tab and sort by Num Events.

Here, you can spot pages/directories/files that are:
- Being crawled too much, and aren’t important.
- Not being crawled at all, but are important.
- Not being crawled enough, but are important.
- View Directory Crawl Frequency – To check the crawl frequency of your directories, navigate to the Directories tab and sort by Num Events.

- View File Crawl Frequency – To check the crawl frequency of other files such as images, JavaScript and CSS, navigate to the URLs tab, sort by Num Events, and Filter by content type.

- View User Agent Crawl Frequency – To check which user-agents are crawling your site the most, navigate to the User-Agents tab and sort by Num Events.

- View All Crawled URLs – You can see exactly which URLs search engine bots like Googlebot have crawled on your site via the URLs

- Estimate Your Crawl Budget – The Overview tab provides a summary of stats such as Unique URLs per day (number of URLs crawled by bots in a day), Total Events and Events per day (number of requests made by bots in a day) to gauge your crawl budget.

- Identify Accessibility Issues – Use the Response Codes tab to identify pages that may have returned 3xx, 4xx, and 5xx response codes when search engines tried to access them.

- Spot Orphan Pages – Combining your log file data and a general crawl from Screaming Frog allows you to easily find orphaned pages. To do this, import your site’s crawl data by dragging and dropping your file into the Imported Data URL tab.
Then, use the View filters in the URLs and Response Codes tab to see pages that were discovered by search engine bots in your log file, but did not appear in the imported crawl data.
These are your orphaned pages.

- Identify Potential Performance Issues – Find URLs and files that may be too large and hinder your site’s SEO performance.
Navigate to the URLs tab and sort by Average Bytes.
You can use the Filter drop-down and do the same with Images, JavaScript files, etc.

As you can see, looking at your server log file using Screaming Frog allows you to quickly pick out lots of crucial technical SEO problems that you may not otherwise be aware of.
HTTPS
What is HTTP & Why Is It Important?
If you’ve yet to make the switch to HTTPS (HyperText Transfer Protocol Secure), then it’s about time you did.
It’s a known fact that switching your site over from HTTP to HTTPS will give your site a subtle boost in search engine rankings – in other words, it’s a confirmed (albeit lightweight) SEO ranking factor.
Aside from this, it’s also great for security and user experience as it means that your visitors’ data will stay protected and secure.
As a result, they’ll be more likely to enter sensitive data such as their payment details into your site.

As John Mueller states in the above tweet, all you need is a free certificate from Let’s Encrypt!
HTTPS Audit Checklist
Here are some basic SEO checks you should make when shifting over to HTTPS:
- Choose the right certificate for your site:
- Single – If you have just one domain
- Multi-domain – If you have multiple domains
- Wildcard certificate – If you have one domain, with multiple subdomains.
- Use 2048-bit key certificates.
- Ensure the HTTPS site isn’t blocked from crawling by your robots.txt.
After you’ve made the move to HTTPS, here are a few things to keep in mind:
- Redirects – As mentioned in the Redirects section, make sure that your HTTP pages all redirect to their respective HTTPS versions.
- Indexation – Ensure that none of your HTTP pages are indexed by Google.
- Sitemaps – Update your XML sitemap with the new HTTPS versions of your pages, otherwise, Google may not crawl/index them.
- Expiration – It’s great that you’ve got an SSL certificate, but ensure that you renew it before it expires!
It’s funny how a single letter in the URLs of your website can affect its SEO performance! But as we’ve seen, the benefits of shifting your site from HTTP to HTTPs extends beyond SEO – so we highly recommend that you make the move.
JavaScript SEO
Most modern sites are built using JavaScript (JS for short), a programming language that is indicated using a <script> tag within HTML code, or via separate .js files.
JavaScript allows webmasters to create a richer user experience as it allows for better interactivity by dynamically updating content.

What is JavaScript SEO?
JavaScript SEO is an important aspect of technical SEO with the aim of optimizing JavaScript-heavy sites so that they are as search engine-friendly as possible.
In other words, it’s about making sure that your JS code is easy for Google to crawl and index.
Why is JavaScript SEO Important?
JavaScript SEO is important because Google now has to render JS code before it can index a web page.

Above is a diagram from Google outlining the steps it takes to crawl, render and index a page.
We won’t go into detail about how this works, but what you need to know at this stage, is that if your JS isn’t implemented properly, Google will struggle to fully crawl, render and index your web pages.
It goes without saying, if Google is unable to perform these three steps, your website will not perform well in the search rankings.
JavaScript SEO Checklist
Unsurprisingly, we’ve put together a nifty JavaScript SEO audit checklist to help ensure that your JS code can be crawled, rendered, and indexed by Google.
- Test for Crawlability – If you have external JS files, it’s crucial that you don’t block them from being found in your robots.txt.
To prevent this from happening, add the following rules to your robots.txt:
User-Agent: Googlebot
Allow: .js
Allow: .css
Remember, Google doesn’t index these pages, but you need to make them accessible so that they can be crawled and rendered.
- Test for Renderability – You can test to see how Google renders your web pages via the URL Inspection tool in Google Search Console.
Use the TEST LIVE URL button to start Google’s rendering test.

After a few minutes, you’ll see a new tab titled LIVE TEST appear along with a display like this.
Here, you should look for anything that suggests that some of the content is missing due to blocked resources. Click VIEW TESTED PAGE > MORE INFO to view any renderability errors.

- Test for Indexability – Once you know that Google is able to crawl and render your JS, it’s important to check whether the content has been indexed.
To do this, use a simple site search.
site:yourdomain.com/your-page/Here’s what you should see if it’s been indexed:

And if not, this is what you’ll see:

To check whether certain parts of your content was “seen” by Google, use a site search like the below.
site:yourdomain.com/your-page/ “some content from your page”
You can also check whether your JS content is indexed via the URL Inspection tool (on Google Search Console) via the GOOGLE INDEX tab, and clicking on VIEW CRAWLED PAGE.

Here are some checks you can make in case your JS was not rendered by Google:
- Check Your Meta Robots Tag – Googlebot will not render or index a page if it encounters a noindex tag in the robots meta tag before running JavaScript.
For example if this line of code:
<meta name="robots" content="noindex, nofollow">Appears before this JavaScript code:
<script>
// this is some JavaScript code
</script>
Then Googlebot will skip rendering the JavaScript code and will not index the page.
- Check Your URLs For Hashes – A common pitfall with JavaScript SEO is sites that have automatically generated URLs containing a hash (#) symbol. Ensure none of your URLs contain a hash.
For example: https://example.com/web-page-with-hash-#
- Check Your Paginated Pages – Googlebot cannot “click” or “scroll” on a page. This means that any content where the user would have to interact with the content in some way, is likely not renderable by the search engine.
This is common with pagination pages on eCommerce sites where customers can “click to view more products”.

To prevent this, ensure that you use static links to help Googlebot reach those pagination pages.
- Look Out For Timeout Errors – Google’s web rendering service has timeouts. This means that Google may skip the indexing process if the JS on that page takes too long to render. This is one of the errors that you may come across when testing via the URL Inspection tool on Google Search Console.
- Check Your Lazy-Loading Implementation – Ensure that the relevant content (primarily images) is visible in the viewport to allow Googlebot to render your content when you implement lazy loading.
If you’ve never thought about looking at your JavaScript code, we hope that you will now.
By making JS a part of your technical SEO audit, you’ll be doing your website’s search presence a massive favor by making sure that it can be crawled, rendered and indexed by search engines.
Remember, the best place to find and fix JS issues is via the Mobile-Friendly Test or the URL inspection tool in Google Search Console.
For more information on the basics of JavaScript SEO, check out this useful article from Google.
Site Structure
The next technical SEO element we’ll focus on is site structure.
What is Site Structure?
Site structure refers to how the content on your website is organized and importantly, how this content is linked together.

Why is Site Structure important?
How you structure your website (and the information within it) is important for both users and search engines.
For Users
A well-structured site makes it much easier for users to navigate and find the information they’re looking for – it improves their experience.
An added benefit is that your pages will have a chance of appearing as sitelinks in the search engine results page.

A sitelink is where Google displays a core landing page (commonly the homepage), along with several other relevant internal pages.
These are great for improving click-through rates (as they take up more space on the results page), offer a better insight into your site’s structure for users, and also helps build more trust and authority within your business/site.
For Search Engines
Having a meaningful and logical structure makes it easier for search engines to understand how your content is related as well as improves crawlability and indexability.
On top of this, by linking your pages properly, you’ll be maximizing your SEO efforts by passing precious PageRank across your site.
Site Structure Audit Checklist
Whether you’re designing a new site or want to audit your structure, here are the core things you should keep in mind:
- Use a Flat Site Structure – A flat structure ensures that all pages can be accessed by no more than 4 clicks from your homepage.

Adopting this approach (as opposed to a deep site structure where pages can be accessed by more than 4 clicks), ensures that you’re passing link authority to and from all of your pages.
Using Screaming Frog to crawl your site, you can visualize your current architecture with ease.
The tool also has a dedicated “Site Structure” tab which shows you an aggregated directory tree view of the website.
- Use Content Siloing – Use content siloing so that your content has a “clear conceptual hierarchy”.
Content siloing allows you to organize your site content based on topical relevance and the perceived search intent of the user at various stages of their search journey.
Here’s an example of how you might do this if you have an online business selling Audio equipment:
- https://audiohaven.com/ – homepage
- https://audiohaven.com/turntables/ – key silo category page (high level categories)
- https://audiohaven.com/turntables/brands/ – category page
- https://audiohaven.com/turntables/brands/rega/ – sub category page
- https://audiohaven.com/turntables/brands/rega/rega-rp1/ – product page
- https://audiohaven.com/turntables/blog/setting-up-your-rega-rp1/ – blog page
- https://audiohaven.com/turntables/brands/rega/rega-rp1/ – product page
- https://audiohaven.com/turntables/brands/rega/ – sub category page
- https://audiohaven.com/turntables/brands/ – category page
- https://audiohaven.com/turntables/ – key silo category page (high level categories)
The idea here is to guide your prospective client or visitor through a particular funnel that eventually leads them to your core money page(s).
- Use Internal Linking – we’ve already established that Google uses links to discover new content. Therefore, a well-connected site structure makes it much easier for the search engine to understand how your website content is connected.
Add internal links to and from relevant web pages on your site.
In our example from above, we would add a link from the /turntables/ page to the /brands/ page, and a link from the /brands/ page to the /rega/ page etc. This way, you create a clear and simple path for Google to follow.

Your site structure may be something you had overlooked when designing your website. But the good news is that you can still turn things around and enhance your SEO performance by including it when you carry out your next technical SEO audit.
FAQs
How Long Does a Technical SEO Audit Take?
A technical SEO audit can take anywhere from 10 to 80 hours depending on complexity of the website, and SEO tests you run.
How Much Is a Technical SEO Audit?
A technical SEO audit can range widely based on the scope of the audit and the professional conducting it. It can range from a few hundred to several thousand dollars.
What Is a Good SEO Audit Score?
A good SEO audit score is typically above 80%. However, the goal should always be to strive for 100% to ensure all technical aspects of the website are optimized for search engines.
The Bottom Line
Conducting a technical SEO audit is the cornerstone of every successful SEO campaign.
By following our comprehensive technical search engine optimization audit guide on index bloating, you’ll be able to ensure that search engines can discover and index your content. After all, if search engine bots can’t find your pages, they’ll never be able to rank
You’ve also seen the benefits of analyzing the performance of your site by making sure that it loads quickly for both mobile and desktop users. After all, if your web pages take too long to load, users won’t stay on your site.
We also highlighted the importance of other technical SEO factors such as JavaScript SEO and server log file analysis as well as looked at why you should optimize your site structure.
Ask yourself: is my website’s technical SEO on point? If not, you now know what to do… you need to do a technical SEO audit!
